Drawing a smiley face, part 2
This is part 2 of a tutorial, making a simple drawing in Inkscape and formatting it for the Eggbot.
<<< Part 1 || Smiley Face Tutorial || Part 3 >>>
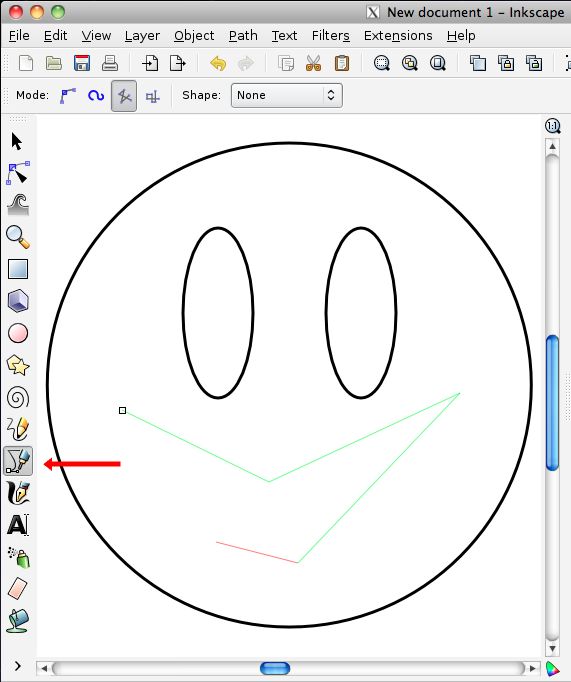
13. Let's add the smile. Select the tool shown, which has the ungainly name "Draw Bezier curves and straight lines." Use it to draw a simple smile-- just clicking once each to form each vertex. On your last vertex, close the shape by clicking again on the initial vertex. The cursor will highlight when you hold it over that initial point.
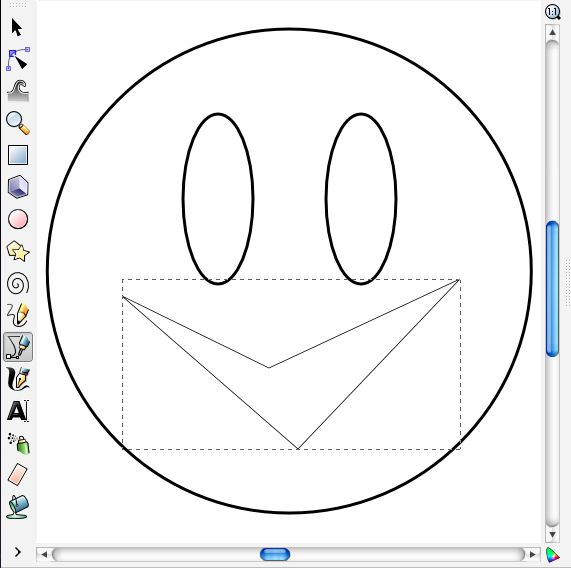
14. Now find the editing tools. The highlighted tool on the left-hand side is called "Edit paths by node." You can use it to select the path and show the vertices in it. You can also click the individual vertices and drag them around. Use this tool to drag the vertices, and make a more symmetric, better-placed smile. (Our standards are pretty low, here!)
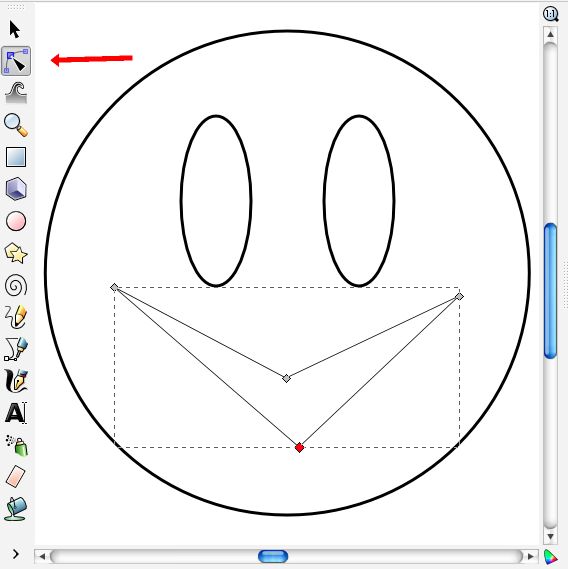
15. Select the two center nodes by clicking on them sequentially with the shift key down, or dragging a rectangle around them
with the edit paths by node tool selected. In the lower toolbar at the top of the screen, click the "Make selected nodes symmetric" button to turn the selected vertices from angled corners into curvy corners. Optionally, drag the control points around a bit to make a nicer smile.
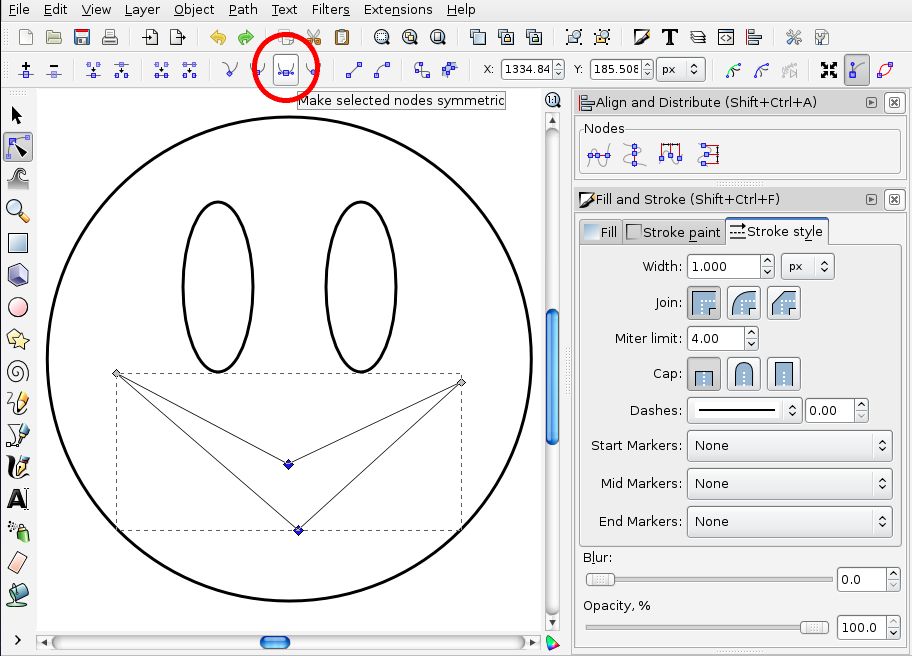
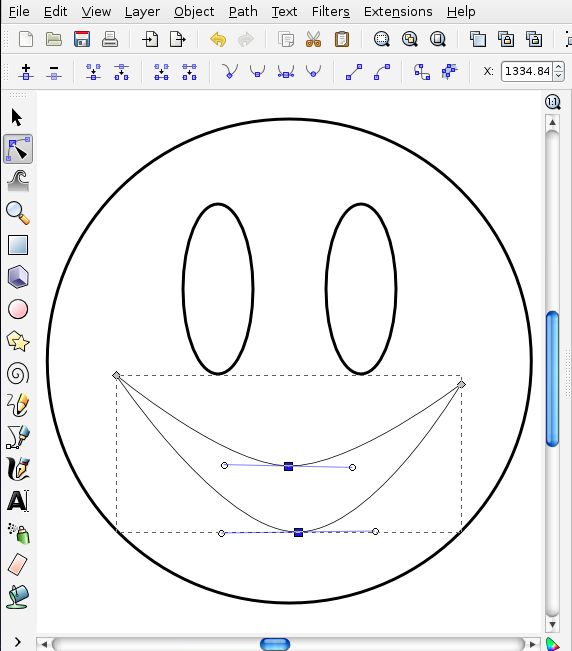
From fill and stroke pane, again give this object a 4 px width.
16. At this point, you can use the normal arrow tool and click outside the drawing to deselect all the objects.
The drawing, at this stage, is then a simple single-color outline drawing of the smiley face. And you can send it to the eggbot, "as is" at this point. What you'll get is just that-- a simple set of outlines, drawn in a single color, by whatever pen you choose to use.
In fact, here's how it looks if you plot at this stage, on a golf ball:
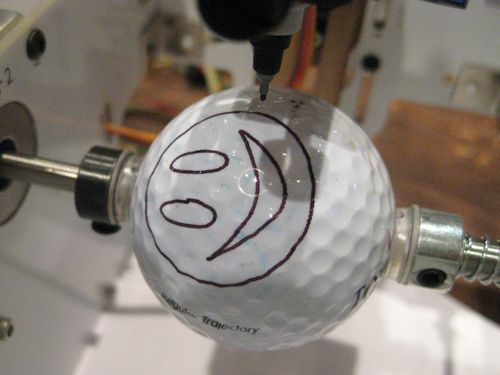
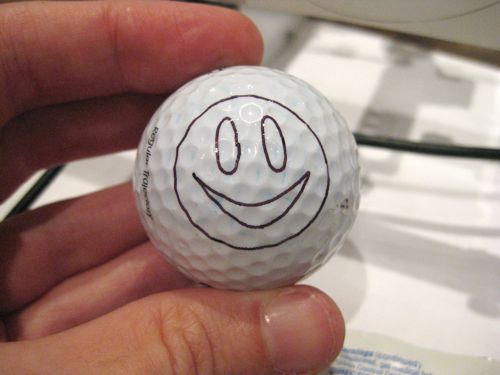
That's pretty good, however, we'd like to do a few more things, that we'll get to in what follows:
- Separate out the drawing into layers that we can print in different colors (Outer circle in yellow, eyes and smile in black)
- Fill those regions, rather than just printing the outlines.
17. Layers.
Thus far, we've drawn objects as though they're arranged on a blank canvas. More generally, though, Inkscape acts more like you're drawing on sheets of transparent film, where you can assign certain objects to be in different layers of film that are above or below each other.
Our use of layers isn't (usually) to arrange which objects are "in front" or "in back," but rather to provide a mechanism for multi-color (that is to say, multi-pen) plots on the eggbot. If you have a drawing with multiple layers, you can have Inkscape plot a single layer, or some set of layers to the eggbot, and pause between for you to change pens. In our case, what we'll do is have two layers: a layer that we'll print in black (for the eyes and smile) and a layer that we'll print in yellow (for the outline).
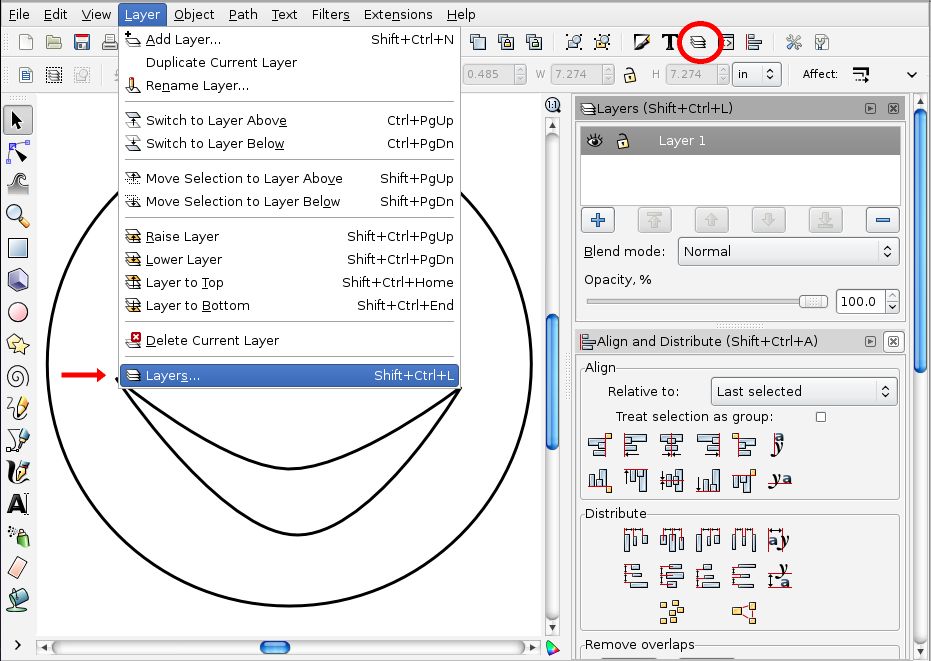
Open the "Layers…" panel. You can do this either by selecting "Layers..." from the Layer menu, or by clicking the symbol that we've highlighted in the upper tool bar.
18. Changing the layer name.
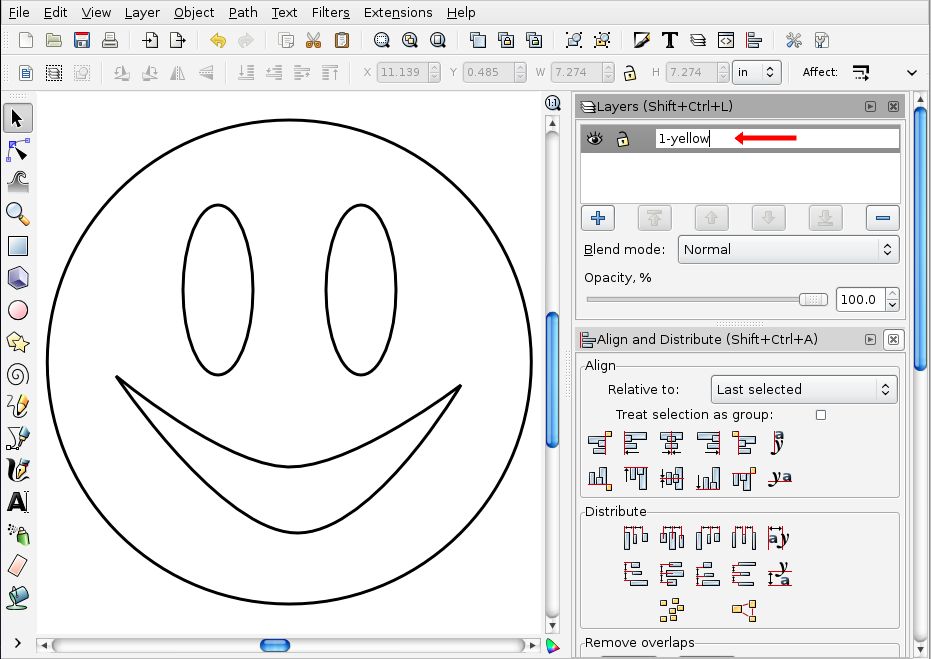
When the Layers panel is first opened, you'll see that your document has a single layer that's initially present, and where your objects currently reside. It's called "Layer 1." However, that's not a very good name. Instead, let's call it 1- Yellow. Click on the name to edit it, and type the new name.
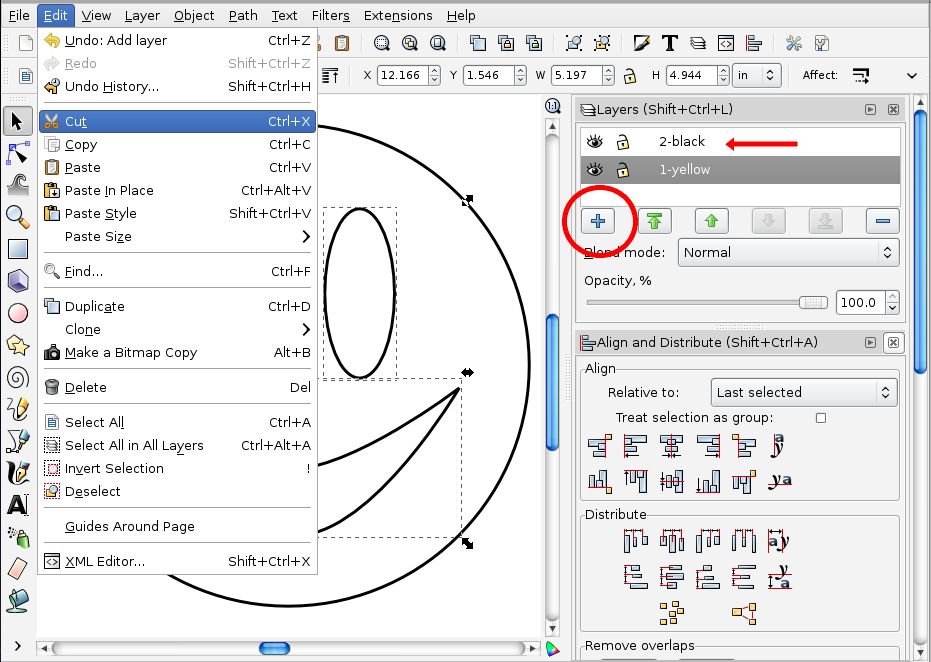
Then, add a second layer called 2-Black. To do this, hit the "+" button to create a new layer, and then name it as before. (The "+" Button is highlighted in the following screenshot.)
The order of layers and their names are not particularly important *except for* the leading number. You can tell the eggbot to plot all layers starting with the number 6, for example. Layers can be renamed as needed, of course.
19. Moving things between layers.
All of the objects are currently on layer 1-Yellow, but we really want to have our black shapes on the black layer. So, let's move them. Usually the easiest way to move objects between layers is to select them, cut them, and then paste them into the correct layer.
The procedure is as follows:
- Select the smile and the two eyes, using the normal arrow tool (the Select and transform object tool). You can select multiple objects by holding down the shift key.
- From the edit menu, select "Cut."
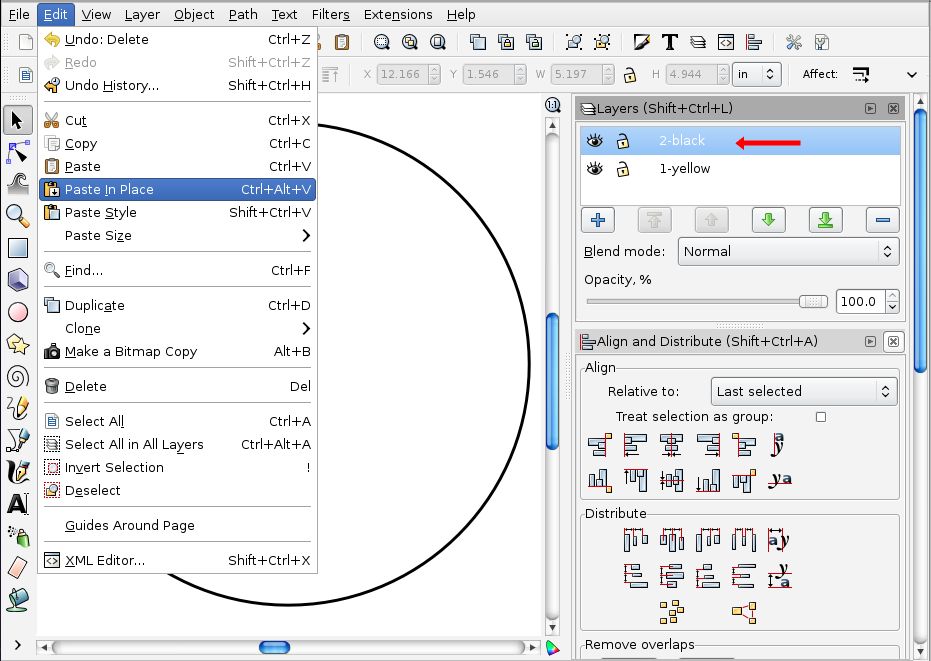
- In the layer pane, click on the layer 2-black to select it.
- Then, from the Edit menu, select "paste in place." The objects are now on the black layer.
20. Hiding layers.
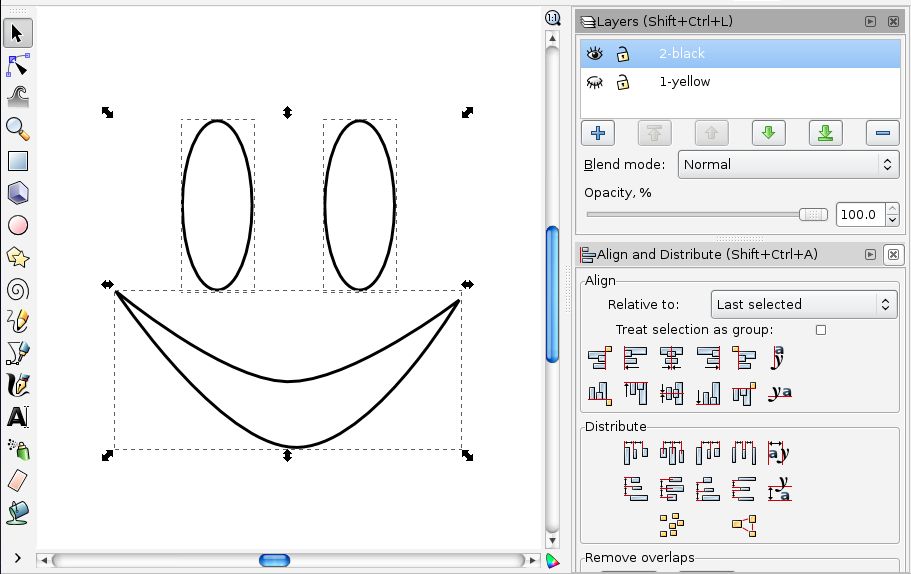
One nice feature about Layers is that you can hide objects in layers that you aren't working in. Hide the black layer by clicking the "eye" icon by layer 1-yellow. Then, show the black layer and hide the yellow layer-- by doing this, you can verify that each object is actually on the layer where it belongs.
21. Changing stroke color
Because you have the two different parts of the drawing on the two different layers, You can plot this, now, with different pens, to get different colors on the two layers: Plot layer 1 to plot the yellow circle (using a yellow pen), then plot layer 2 to plot the black outlines. However, it is often handy to label the "ink" in different layers with different stroke paint, to help remember what's supposed to print in what color. (Just remember that drawing it in a different color on the screen doesn't change the color of your pen!)
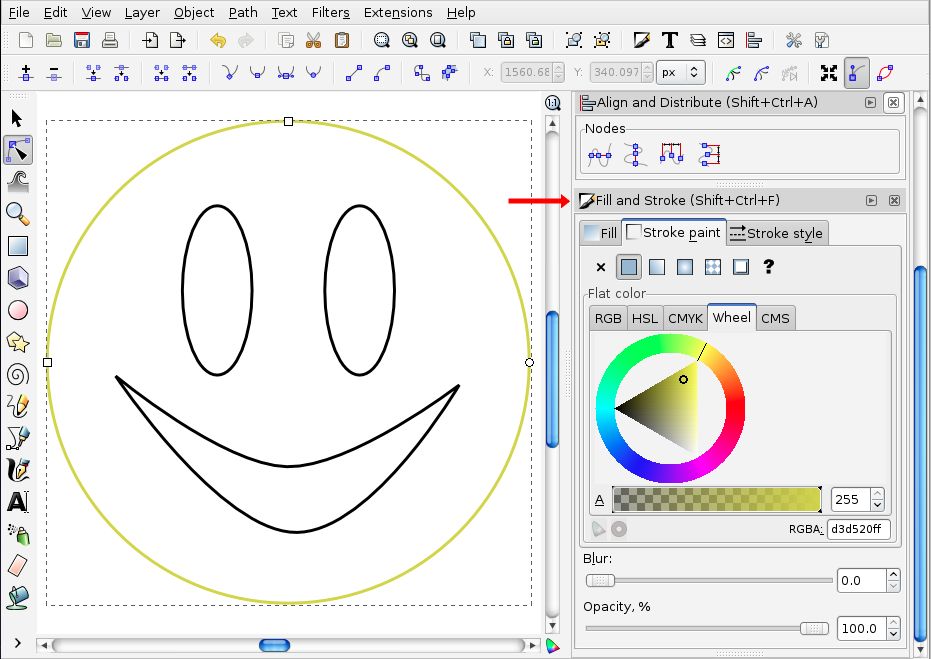
Select the circle by clicking on it. Scroll down to the Fill and Stroke panel on the right side (or open it if you've already closed it). In the Stroke paint tab, change the color of the circle. Here, we've changed it to dull yellow so that you can see that it's a different color from the eyes and smile.
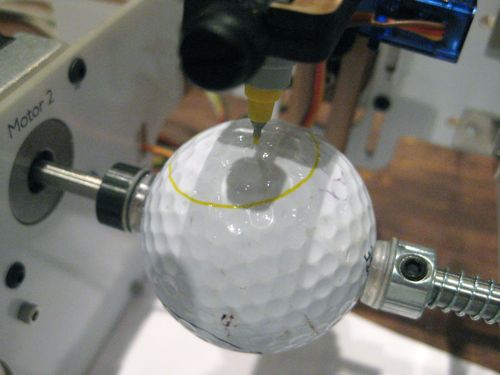
And, here's how it looks when we plot it, first the "yellow" layer, then the "black" layer, switching pens inbetween:

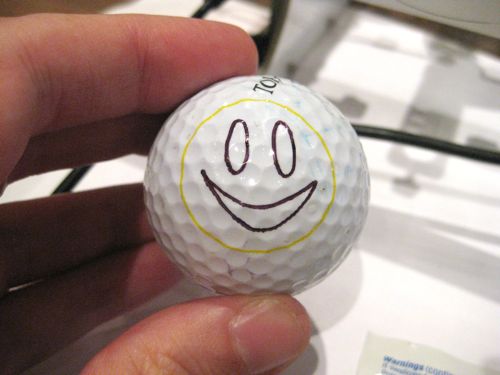
That's pretty neat. But what about filling areas with ink? We'll get to that in Part 3.
<<< Part 1 || Smiley Face Tutorial || Part 3 >>>

