Sencah Touch2를 이용한 하이브리드 앱 개발 - 5.Store-bound Components
서론
앱을 만들다보면 가장 많이 사용하는 UI가 바로 아이폰에서는 UITableView 이고 안드로이드폰에서는 ListView가 아닌가 생각된다. 리스트는 데이터를 출력시키는 UI로 모든 앱에서 반드시 필요하고 가장 많이 사용하는 UI이다. Sencha에서는 ListView를 Store-bound components 범주에 포함시키기고 있다. 이유는 Store라는 것을 사용하는 Ext.Component 들 중에 하나이기 때문이다. Sotre는 나중에 Sencha의 Model에가서 좀더 자세히 설명할 것이다. 여기선 뷰에 데이터를 출력시키는 데이터 저장 공간으로 생각하기로 하자.
DataView
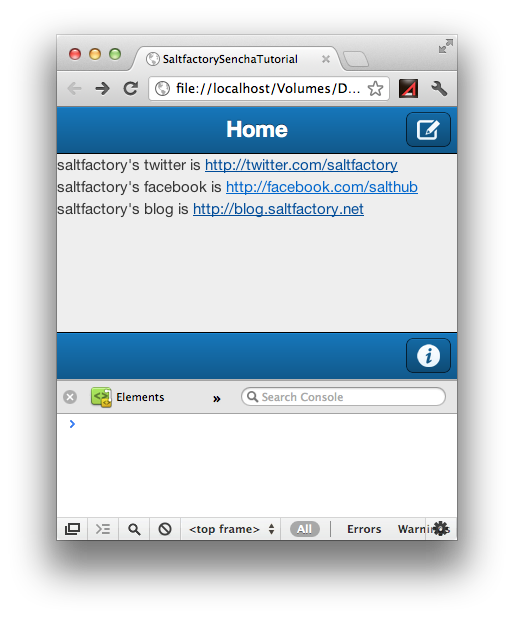
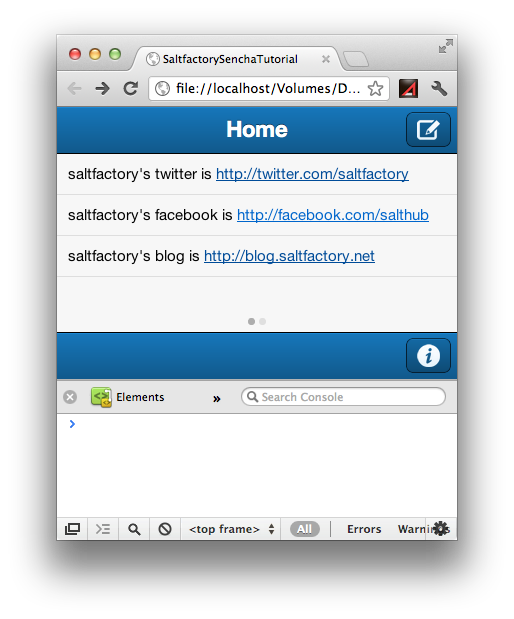
DataView는 말 그래도 data를 가지고 표현하는 view 이다. store라는 곳에 데이터를 임시적으로 캐싱해서 fields에 맞는 데이터들을 반복해서 출력하게 되는데 이 때, itemTpl 이라는 속성에서 {} 표현식 안에 store에 저장된 field의 이름을 매핑해서 출력할 수 있다. 이 방법은 Rails나 Django 등에서 view template에서 데이터를 표현하는 방법과 같은 방법이다. 우리는 앞에서 살펴본 코드에 다음과 같이 코드를 수정하자.
/**
* file : MainView.js
* author : saltfactory
* email : saltfactory@gmail.com
*/

Ext.define('SaltfactorySenchaTutorial.view.MainView', {
	extend: 'Ext.Panel',
	alias: 'main_view',
	config: {
	    styleHtmlContent: true,
		//html: '<h1>Hello, World!</h1>',
		fullscreen: true,
		layout:{
			type: 'card',
			align: 'start',
			pack: 'start'
		}
	},


	initialize: function(){
		var titlebar = {
			xtype: 'titlebar',
			docked: 'top',
			title: 'Home',
			items: [
			{
				xtype: 'button',
				iconCls: 'compose',
				iconMask: true,
				align: 'right',
				handler:function(){
					console.log('tap compose button')
				}
			}
			]
		}

		var toolbar = {
			xtype : 'toolbar',
			docked: 'bottom',
			items: [
			{
				xtype: 'spacer'
			},
			{
				xtype: 'button',
				iconCls: 'info',
				iconMask: true
			}
			]
		}

		var dataview = {
			xtype: 'dataview',
			fullscreen: true,
			store: {
				autoLoad: true,
				fields: ['contact', 'url'],
				data: [
				{contact: 'twitter', url: 'http://twitter.com/saltfactory'},
				{contact: 'facebook', url: 'http://facebook.com/salthub'},
				{contact: 'blog', url: 'http://blog.saltfactory.net'}
				]
			},
			itemTpl: '<div> saltfactory\'s {contact} is  <a href="{url}">{url}</a>'
		}


		this.add([titlebar, dataview, toolbar])
	}
});
위의 코드에 대해서 다시 좀더 설명을 하자면, Ext.dataview.DataView에서 저장된 되이터를 출력할 것인데, store 라는 곳에서 저장된 되이터를 관리한다. 이 때 data 라는 곳에서는 실제 데이터가 저장되어 캐싱되는 곳이고 fields에서 store에 저장된 data의 형태를 정의한다. 그리고 datView에서 데이터를 출력시킬 때는 itemTpl 이라는 속성에서 정의한 대로 출력을 하는데 이 때 {} 를 이용해서 data에 저장된 field의 이름을 매핑해서 html과 같이 렌더링해서 코드를 완성시킨다.
Carousel
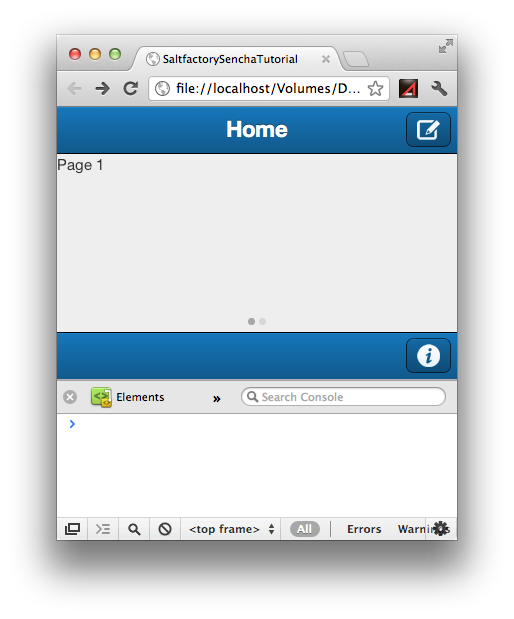
Carousel는 회전목마라는 뜻인데 Ext.Carousel은 아이폰의 UIPageController와 동일한 구성을 만들 수 있는 Sencha의 Ext.Component 이다. 위 코드에 Carousel을 구성하기 위한 코드를 추가하고 다음과 같이 수정해보자.
/**
* file : MainView.js
* author : saltfactory
* email : saltfactory@gmail.com
*/

Ext.define('SaltfactorySenchaTutorial.view.MainView', {
	extend: 'Ext.Panel',
	alias: 'main_view',
	config: {
	    styleHtmlContent: true,
		fullscreen: true,
		layout:{
			type: 'card',
			align: 'start',
			pack: 'start'
		}
	},


	initialize: function(){
		var titlebar = {
			xtype: 'titlebar',
			docked: 'top',
			title: 'Home',
			items: [
			{
				xtype: 'button',
				iconCls: 'compose',
				iconMask: true,
				align: 'right',
				handler:function(){
					console.log('tap compose button')
				}
			}
			]
		}

		var toolbar = {
			xtype : 'toolbar',
			docked: 'bottom',
			items: [
			{
				xtype: 'spacer'
			},
			{
				xtype: 'button',
				iconCls: 'info',
				iconMask: true
			}
			]
		}

		var dataview = {
			xtype: 'dataview',
			fullscreen: true,
			store: {
				autoLoad: true,
				fields: ['contact', 'url'],
				data: [
				{contact: 'twitter', url: 'http://twitter.com/saltfactory'},
				{contact: 'facebook', url: 'http://facebook.com/salthub'},
				{contact: 'blog', url: 'http://blog.saltfactory.net'}
				]
			},
			itemTpl: '<div> saltfactory\'s {contact} is  <a href="{url}">{url}</a>'
		}

		var carousel = {
			xtype: 'carousel',
			fullscreen: true,
			defualts: {
				styleHtmlContent: true
			},
			items: [
			{
				html: 'Page 1'
			},
			{
				html: 'Page 2'
			}
			]
		}


		this.add([titlebar, carousel, toolbar])
	}
});
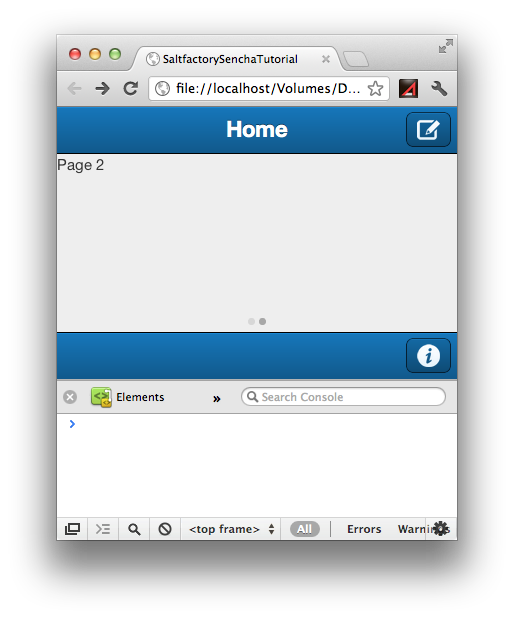
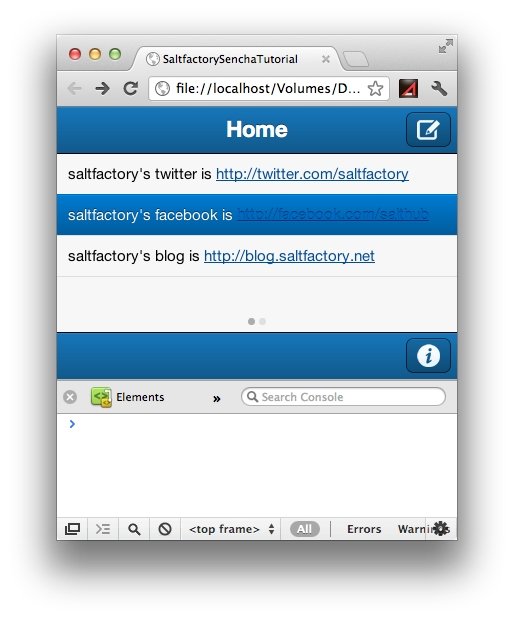
Carousel은 items의 갯수만큼 컴포넌트를 추가할 수 있는 페이지들이 추가가 된다. 예제에서는 items를 두가지로 했기 때문에 2가지 페이지가 추가되었다.
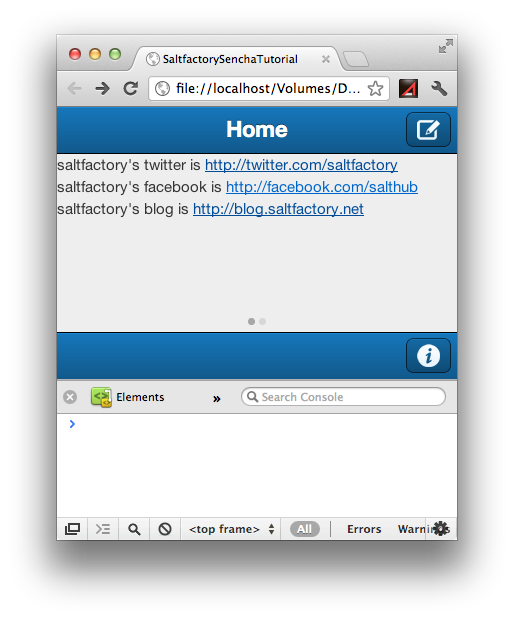
carousel에서 추가되는 items에서는 html 코드말고 Ext.Component도 추가될 수 있다. 우리가 위해서 생성한 dataview 컴포넌트를 carousel의 items에 추가해보자.
/**
* file : MainView.js
* author : saltfactory
* email : saltfactory@gmail.com
*/

Ext.define('SaltfactorySenchaTutorial.view.MainView', {
	extend: 'Ext.Panel',
	alias: 'main_view',
	config: {
	    styleHtmlContent: true,
		fullscreen: true,
		layout:{
			type: 'card',
			align: 'start',
			pack: 'start'
		}
	},


	initialize: function(){
		var titlebar = {
			xtype: 'titlebar',
			docked: 'top',
			title: 'Home',
			items: [
			{
				xtype: 'button',
				iconCls: 'compose',
				iconMask: true,
				align: 'right',
				handler:function(){
					console.log('tap compose button')
				}
			}
			]
		}

		var toolbar = {
			xtype : 'toolbar',
			docked: 'bottom',
			items: [
			{
				xtype: 'spacer'
			},
			{
				xtype: 'button',
				iconCls: 'info',
				iconMask: true
			}
			]
		}

		var dataview = {
			xtype: 'dataview',
			fullscreen: true,
			store: {
				autoLoad: true,
				fields: ['contact', 'url'],
				data: [
				{contact: 'twitter', url: 'http://twitter.com/saltfactory'},
				{contact: 'facebook', url: 'http://facebook.com/salthub'},
				{contact: 'blog', url: 'http://blog.saltfactory.net'}
				]
			},
			itemTpl: '<div> saltfactory\'s {contact} is  <a href="{url}">{url}</a>'
		}

		var carousel = {
			xtype: 'carousel',
			fullscreen: true,
			layout: 'card',
			defualts: {
				styleHtmlContent: true
			},
			items: [
			dataview,
			{
				html: 'Page 2'
			}
			]
		}

		this.add([titlebar, carousel, toolbar])
	}
});
Carousel의 첫번째 페이지에 위에서 설정한 dataview가 표현되는 것을 확인할 수 있다.
List
우리가 앱을 개발할 때 가장 많이 사용할 UI중에 하나인 List는 우리가 앞에서 테스트한 dataview와 동일하게 사용할 수 있다. Sencha는 모든 컴포넌트가 Ext.Component를 상속받아서 사용하는데 Ext.List는 Ext.dataview.DataView를 상속받기 때문에 dataview를 구성하는 것과 동일하게 사용할 수 있는 것이다.
그래서 우리는 dataview를 다음과 같이 list로 변경을 할 것이다.
/**
* file : MainView.js
* author : saltfactory
* email : saltfactory@gmail.com
*/

Ext.define('SaltfactorySenchaTutorial.view.MainView', {
	extend: 'Ext.Panel',
	alias: 'main_view',
	config: {
	    styleHtmlContent: true,
		fullscreen: true,
		layout:{
			type: 'card',
			align: 'start',
			pack: 'start'
		}
	},


	initialize: function(){
		var titlebar = {
			xtype: 'titlebar',
			docked: 'top',
			title: 'Home',
			items: [
			{
				xtype: 'button',
				iconCls: 'compose',
				iconMask: true,
				align: 'right',
				handler:function(){
					console.log('tap compose button')
				}
			}
			]
		}

		var toolbar = {
			xtype : 'toolbar',
			docked: 'bottom',
			items: [
			{
				xtype: 'spacer'
			},
			{
				xtype: 'button',
				iconCls: 'info',
				iconMask: true
			}
			]
		}

		var dataview = {
			xtype: 'list',
			fullscreen: true,
			store: {
				autoLoad: true,
				fields: ['contact', 'url'],
				data: [
				{contact: 'twitter', url: 'http://twitter.com/saltfactory'},
				{contact: 'facebook', url: 'http://facebook.com/salthub'},
				{contact: 'blog', url: 'http://blog.saltfactory.net'}
				]
			},
			itemTpl: '<div> saltfactory\'s {contact} is  <a href="{url}">{url}</a>'
		}

		var carousel = {
			xtype: 'carousel',
			fullscreen: true,
			layout: 'card',
			defualts: {
				styleHtmlContent: true
			},
			items: [
			dataview,
			{
				html: 'Page 2'
			}
			]
		}

		this.add([titlebar, carousel, toolbar])
	}
});
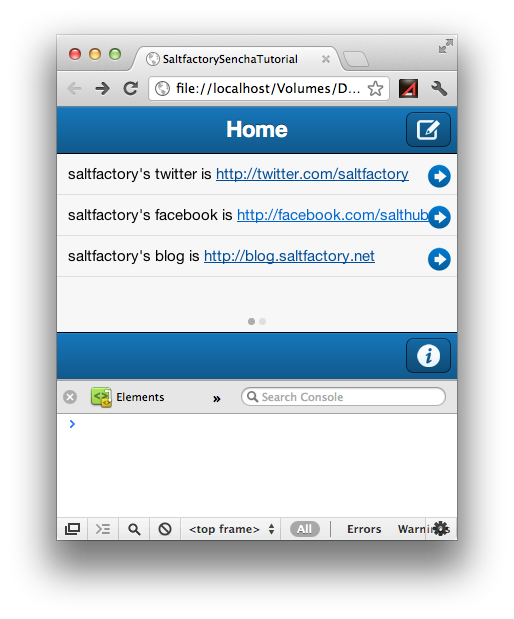
우리는 특별한 작업을 하지 않았고 단지 dataview였던 xtype을 list로 변경했는데, 리스트뷰를 생성해서 출력시켜주는 것을 확인할 수 있다. 만약에 리스트에 출력되는 아이템에 Disclosure 버턴을 추가하고 싶으면 다음과 같이 onItemDisclosure 속성을 추가한다.
/**
* file : MainView.js
* author : saltfactory
* email : saltfactory@gmail.com
*/

Ext.define('SaltfactorySenchaTutorial.view.MainView', {
	extend: 'Ext.Panel',
	alias: 'main_view',
	config: {
	    styleHtmlContent: true,
		fullscreen: true,
		layout:{
			type: 'card',
			align: 'start',
			pack: 'start'
		}
	},


	initialize: function(){
		var titlebar = {
			xtype: 'titlebar',
			docked: 'top',
			title: 'Home',
			items: [
			{
				xtype: 'button',
				iconCls: 'compose',
				iconMask: true,
				align: 'right',
				handler:function(){
					console.log('tap compose button')
				}
			}
			]
		}

		var toolbar = {
			xtype : 'toolbar',
			docked: 'bottom',
			items: [
			{
				xtype: 'spacer'
			},
			{
				xtype: 'button',
				iconCls: 'info',
				iconMask: true
			}
			]
		}

		var dataview = {
			xtype: 'list',
			fullscreen: true,
			onItemDisclosure:function(record, btn, index){
				// disclouse 버턴이 눌러졌을 때, 동작 메소드 정의
			},
			store: {
				autoLoad: true,
				fields: ['contact', 'url'],
				data: [
				{contact: 'twitter', url: 'http://twitter.com/saltfactory'},
				{contact: 'facebook', url: 'http://facebook.com/salthub'},
				{contact: 'blog', url: 'http://blog.saltfactory.net'}
				]
			},
			itemTpl: '<div> saltfactory\'s {contact} is  <a href="{url}">{url}</a>'
		}

		var carousel = {
			xtype: 'carousel',
			fullscreen: true,
			layout: 'card',
			defualts: {
				styleHtmlContent: true
			},
			items: [
			dataview,
			{
				html: 'Page 2'
			}
			]
		}

		this.add([titlebar, carousel, toolbar])
	}
});
Nested List
Store-bound components 에 속한 Ext.component로 마지막으로 Ext.dataview.NestedList 컴포넌트가 있다. 이것은 말 그래도 List와 동일한데 자식 List를 가지고 있는 경우를 말한다. 이것은 우리가 아이폰에서 navigationController에 viewController를 push하는 것과 동일한 기능을 구현한 것이다. Nsted List는 List 를 구성하는 store를 TreeStore로 저장된 data 안에 단계적으로 다른 data가 존재하는 경우이다. Nested List를 설명하기 위해서는 Model을 알고 있어야하는데 Model은 다음 포스팅에 소개할 예정이고 여기서 Model은 간단하게 데이터가 어떻게 저장될지를 논리적으로 정의한 객체라고만 알아두자. 다음과 같이 Nested List를 테스트하기 위한 코드를 추가하자.
/**
* file : MainView.js
* author : saltfactory
* email : saltfactory@gmail.com
*/

Ext.define('SaltfactorySenchaTutorial.view.MainView', {
	extend: 'Ext.Panel',
	alias: 'main_view',
	config: {
	    styleHtmlContent: true,
		fullscreen: true,
		layout:{
			type: 'card',
			align: 'start',
			pack: 'start'
		}
	},


	initialize: function(){
		var titlebar = {
			xtype: 'titlebar',
			docked: 'top',
			title: 'Home',
			items: [
			{
				xtype: 'button',
				iconCls: 'compose',
				iconMask: true,
				align: 'right',
				handler:function(){
					console.log('tap compose button')
				}
			}
			]
		}

		var toolbar = {
			xtype : 'toolbar',
			docked: 'bottom',
			items: [
			{
				xtype: 'spacer'
			},
			{
				xtype: 'button',
				iconCls: 'info',
				iconMask: true
			}
			]
		}

		var dataview = {
			xtype: 'list',
			fullscreen: true,
			onItemDisclosure:function(record, btn, index){
				// disclouse 버턴이 눌러졌을 때, 동작 메소드 정의
			},
			store: {
				autoLoad: true,
				fields: ['contact', 'url'],
				data: [
				{contact: 'twitter', url: 'http://twitter.com/saltfactory'},
				{contact: 'facebook', url: 'http://facebook.com/salthub'},
				{contact: 'blog', url: 'http://blog.saltfactory.net'}
				]
			},
			itemTpl: '<div> saltfactory\'s {contact} is  <a href="{url}">{url}</a>'
		}

		var carousel = {
			xtype: 'carousel',
			fullscreen: true,
			layout: 'card',
			defualts: {
				styleHtmlContent: true
			},
			items: [
			dataview,
			{
				html: 'Page 2'
			}
			]
		}

		var data = {
		     text: 'Groceries',
		     items: [{
		         text: 'Drinks',
		         items: [{
		             text: 'Water',
		             items: [{
		                 text: 'Sparkling',
		                 leaf: true
		             }, {
		                 text: 'Still',
		                 leaf: true
		             }]
		         }, {
		             text: 'Coffee',
		             leaf: true
		         }, {
		             text: 'Espresso',
		             leaf: true
		         }, {
		             text: 'Redbull',
		             leaf: true
		         }, {
		             text: 'Coke',
		             leaf: true
		         }, {
		             text: 'Diet Coke',
		             leaf: true
		         }]
		     }, {
		         text: 'Fruit',
		         items: [{
		             text: 'Bananas',
		             leaf: true
		         }, {
		             text: 'Lemon',
		             leaf: true
		         }]
		     }, {
		         text: 'Snacks',
		         items: [{
		             text: 'Nuts',
		             leaf: true
		         }, {
		             text: 'Pretzels',
		             leaf: true
		         }, {
		             text: 'Wasabi Peas',
		             leaf: true
		         }]
		     }]
		 };

		 Ext.define('ListItem', {
		     extend: 'Ext.data.Model',
		     config: {
		         fields: [{
		             name: 'text',
		             type: 'string'
		         }]
		     }
		 });

		 var store = Ext.create('Ext.data.TreeStore', {
		     model: 'ListItem',
		     defaultRootProperty: 'items',
		     root: data
		 });

		 var nestedlist = Ext.create('Ext.NestedList', {
		     fullscreen: true,
		     title: 'Home',
		     displayField: 'text',
		     store: store,
		     toolbar:titlebar
		 });

		this.add([nestedlist, toolbar])
	}
});
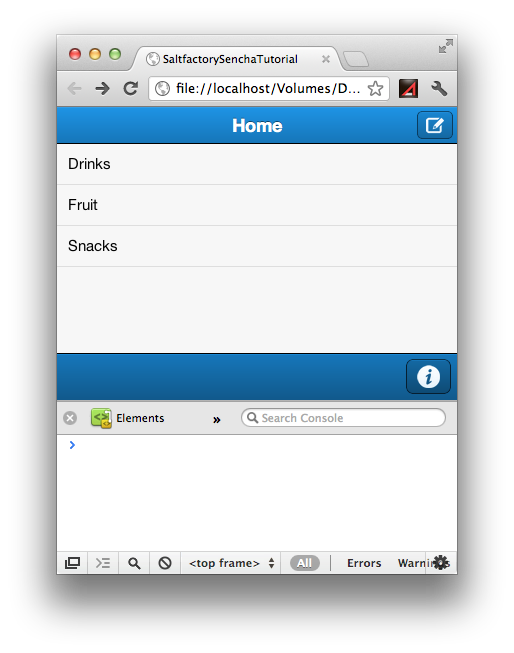
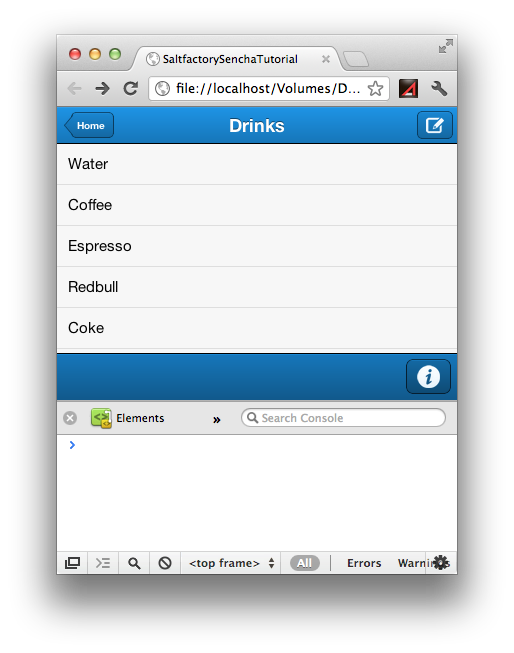
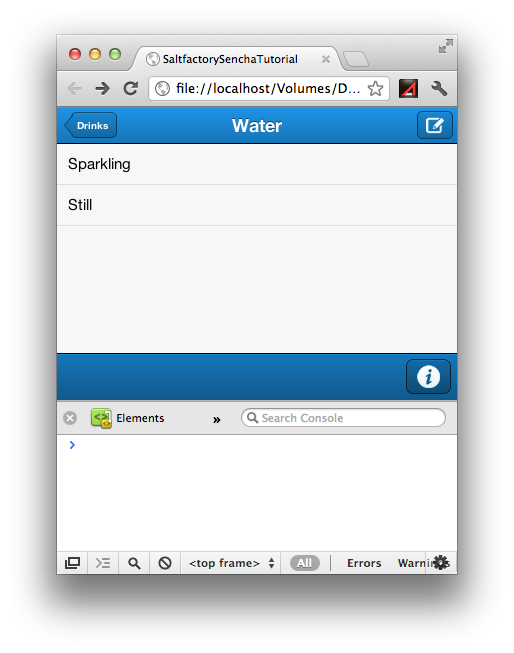
새로 고침해서 웹앱을 재 실행해보자. 아래 그림처럼 세 단계에 데이터 깊이가 있고 각각 하위 데이터가 있으면 nested list는 마치 navigationcontroller에 viewcontroller을 푸시 하듯이 내부로 들어가게된다. 이 때 상단의 백 버턴에는 바로 이전에 선택된 아이템의 텍스트가 나타난다는 것을 확인할 수 있을 것이다. 이것은 iOS의 NavigationController에서 백버턴의 구성과 동일하다. 그림지 작아서 볼 수 없다면 클릭해서 확인할 수 있다.
테스트에 사용된 data는 Sencha Touch2 의 공식 메뉴얼에 포함된 데이터이다. NestedList는 데이터를 네비게이션하기 때문에 자체적으로 Toolbar를 포함하고 있다. 그래서 NestedList에 toolbar를 교체하기 위해서는 외부에서 Ext.Toolbar를 설정해서 넣어주면 된다. 우리는 이미 titlebar라는 것을 만들어 두었기 때문에 NestedList의 toolbar를 titlebar로 지정하였다. NestedList에 관해서는 Ext.data.Model을 설명할 때 다시한번 더 소개하겠다.
결론
이번 포스팅에서는 Ext.Component 중에서도 Store-bound components에 대해서 살펴보았다. 여기에 속한 UI는 앱을 구성할 때 가장 많이 사용하는 UI 컴포넌트들이라 매우 중요한 부분이다. 실제 네이티브 앱에서도 UITableView나 ListView가 가장 많이 사용되기 때문이다. 그리고 NavigationViewController와 같이 리스트의 내부에 자식 데이터가 있으면 마치 navigationcontroller에 push를 하듯 하위로 들어갈 수 있는 UI 컴포넌트가 NestedList라는 것도 확인했다. 다만 Ext.dataview.NestedList는 Ext.data.Model을 상요하는데 우리는 아직 Model을 테스트하지 않아서 단순히 Model은 데이터가 어떻게 저장되는지 논리적으로 정의한 객체라고만 알고 그 모델을 이용해서 NestedList의 Store에 TreeStore로 저장되어 NestedList UI를 구성한다는 것을 알았다. 그리고 NestedList는 자체적으로 toolbar를 가지고 있고 하위로 내려가면 선택된 텍스트가 하위의 백버턴에 그 내용이 나온다는 것을 확인했고, toolbar를 변경하기 위해서 외부에서 Ext.Toolbar를 정의해서 넣어줘야한다는 것도 알게되었다. 이제 우리는 간단한 앱을 만들 수 있는 UI의 조건을 모두 배웠다. 다음 포스팅에서는 Sencha의 Ext.data.Model에 관해서 포스팅할 예정이다.
참고
- http://docs.sencha.com/touch/2-0/#!/api/Ext.dataview.DataView
- http://docs.sencha.com/touch/2-0/#!/api/Ext.carousel.Carousel
- http://docs.sencha.com/touch/2-0/#!/api/Ext.dataview.List
- http://docs.sencha.com/touch/2-0/#!/api/Ext.dataview.NestedList
연구원 소개
- 작성자 : 송성광 개발 연구원
- 블로그 : http://blog.saltfactory.net
- 이메일 : saltfactory@gmail.com
- 트위터 : @saltfactory
- 페이스북 : https://facebook.com/salthub
- 연구소 : 하이브레인넷 부설연구소
- 연구실 : 창원대학교 데이터베이스 연구실
