Steps to get started
To assemble the robot please read the Assembly guide on the Wiki.
When you have assembled your robot you are able to power it up and use it straight out of the box.
However, you can also decide to update the robot to the latest firmware found online, as new improvements are made frequently.
To do this you have to install the latest version of the Arduino IDE.
On the Arduino Guidance page you can find detailed instructions on how to install and run the Arduino IDE.
After you have downloaded and installed the latest version of Arduino IDE you will need to get the Balanduino source code from our GitHub repository by clicking on the following link.
This ZIP-file contains the latest Balanduino firmware to be opened, compiled and uploaded with the Arduino IDE.
Extract the ZIP-file and open up the folder inside, called 'Firmware'. This contains all the files needed in order to compile the firmware for the robot. The 'Balanduino' folder contains the main firmware for the robot while the 'hardware' folder contains the hardware add-on used by the Arduino IDE.
Hardware add-on
Old method
Copy the 'hardware' folder in to your Arduino sketchbook folder. This will allow you to compile and upload the code to the Balanduino, just like a regular Arduino.
New method
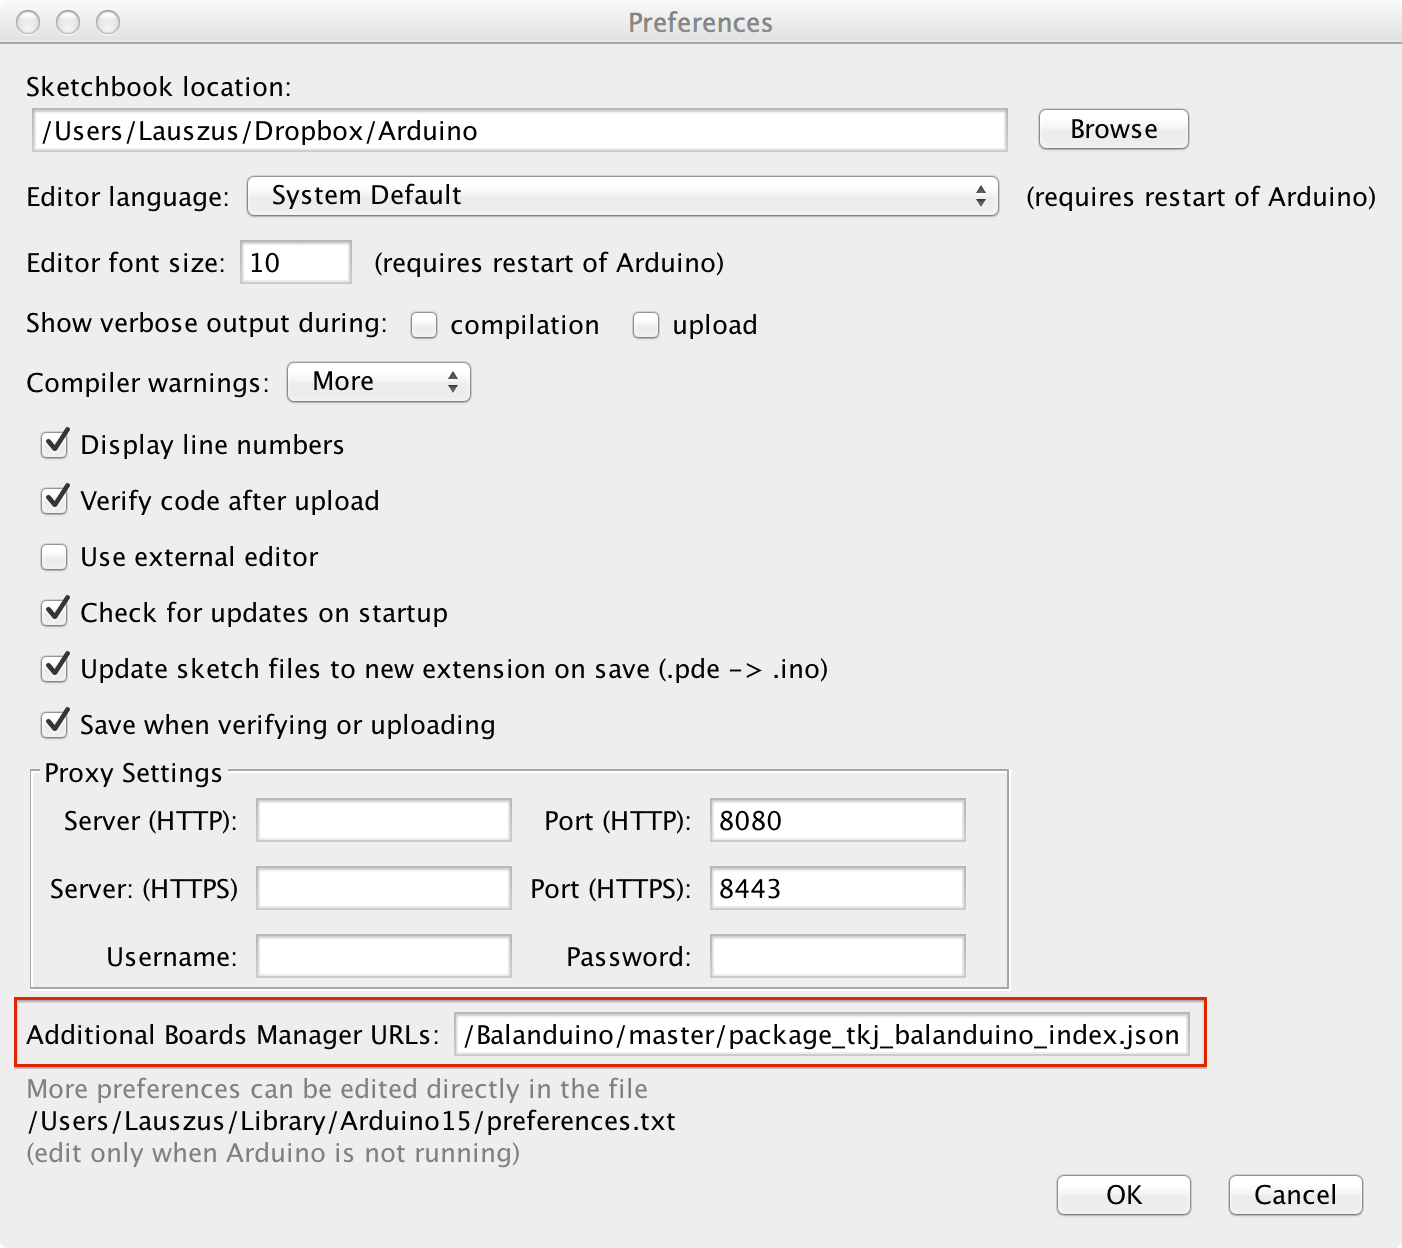
Since Arduino IDE 1.6.4 there is no need to copy the 'hardware' folder manually. Simply open up the preferences and copy the following URL into the 'Additional Boards Manager URLs' field, as shown below.
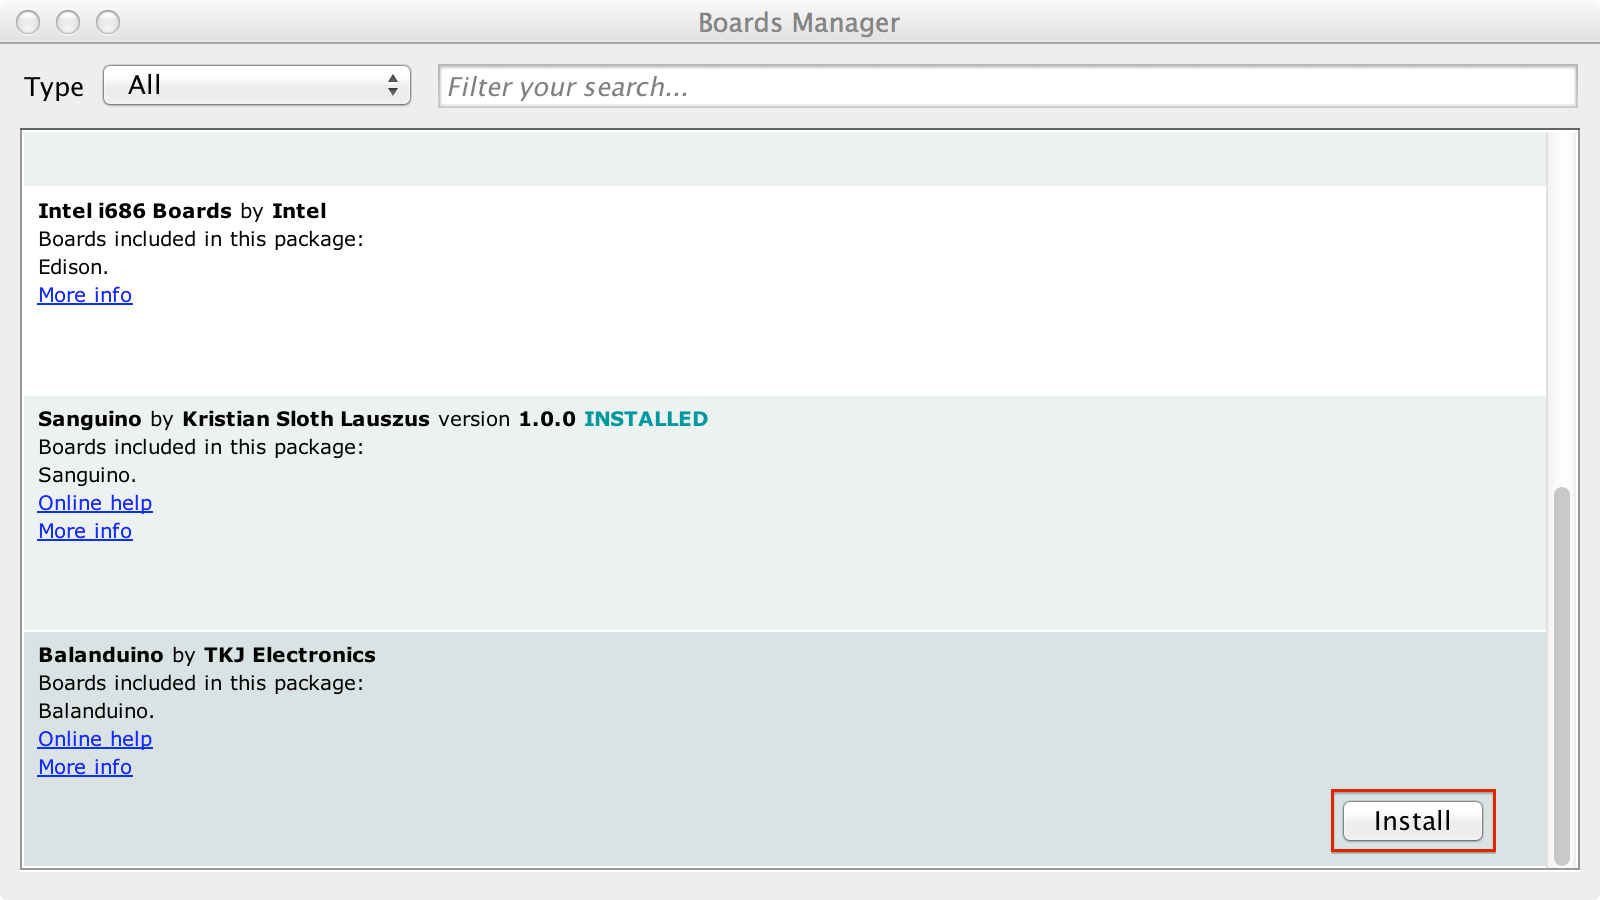
Now navigate into "Tools>Boards>Boards Manager..." and install the Balanduino hardware add-on, as shown below.
Firmware upload
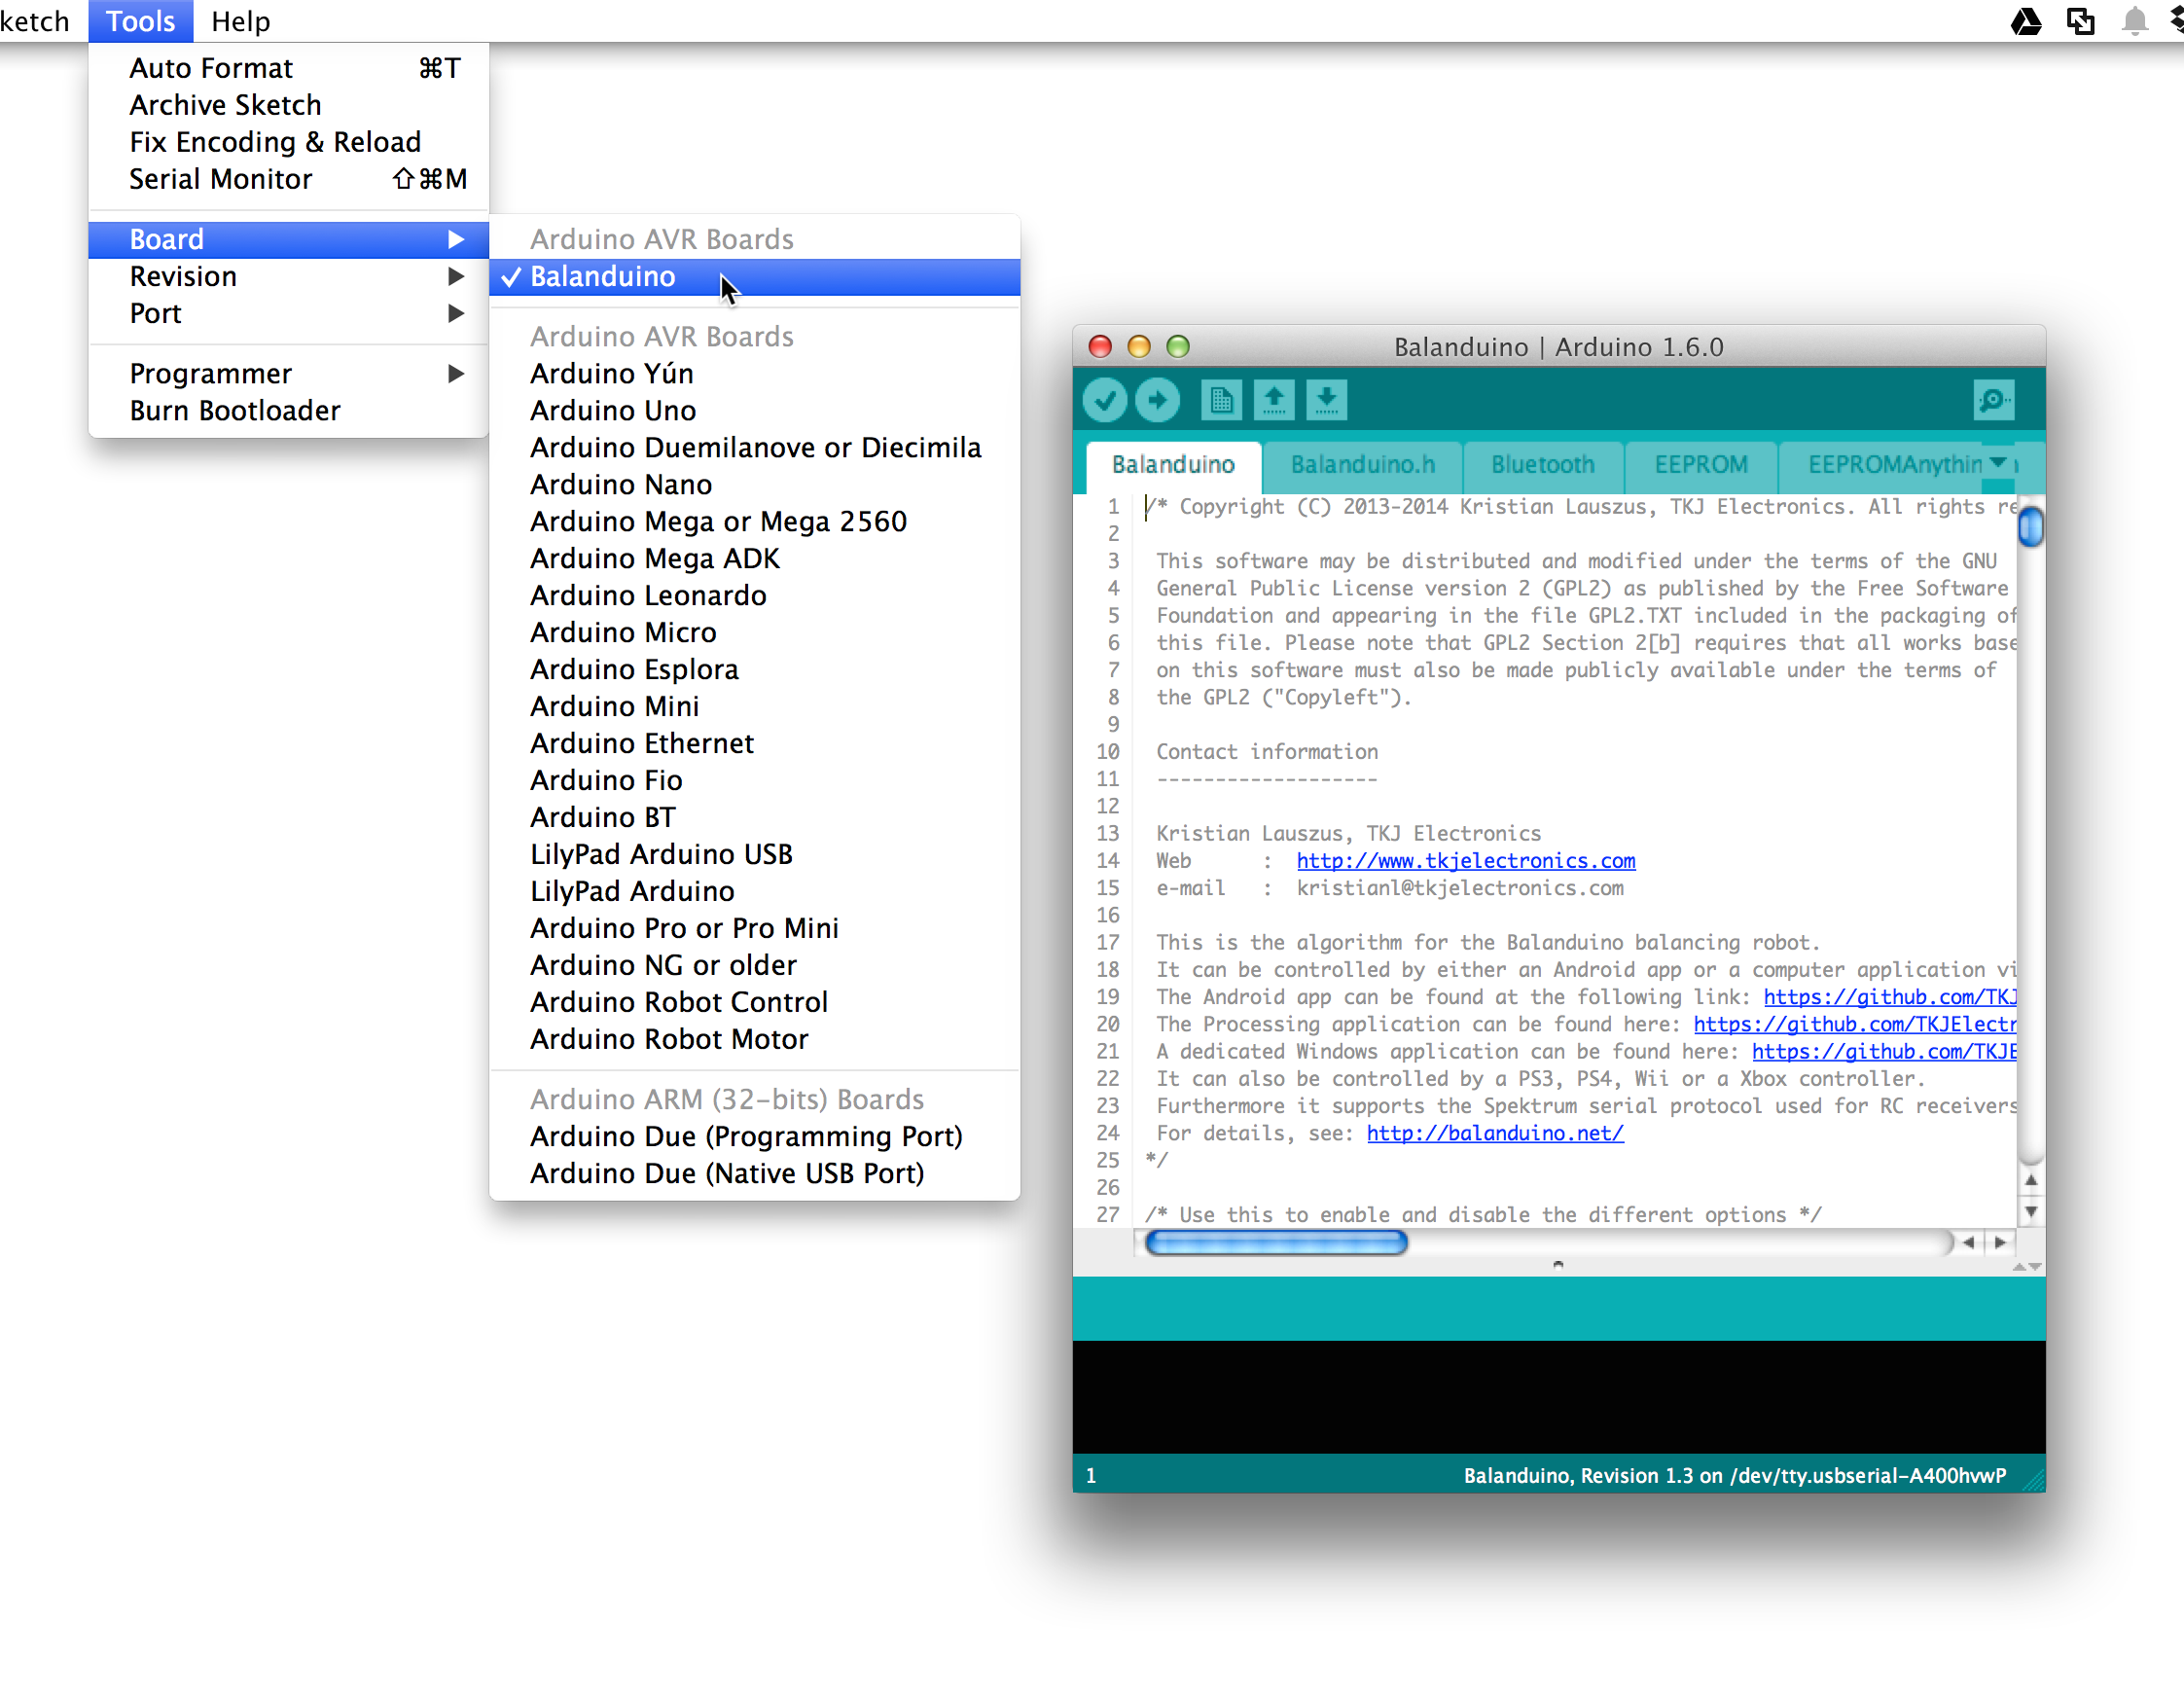
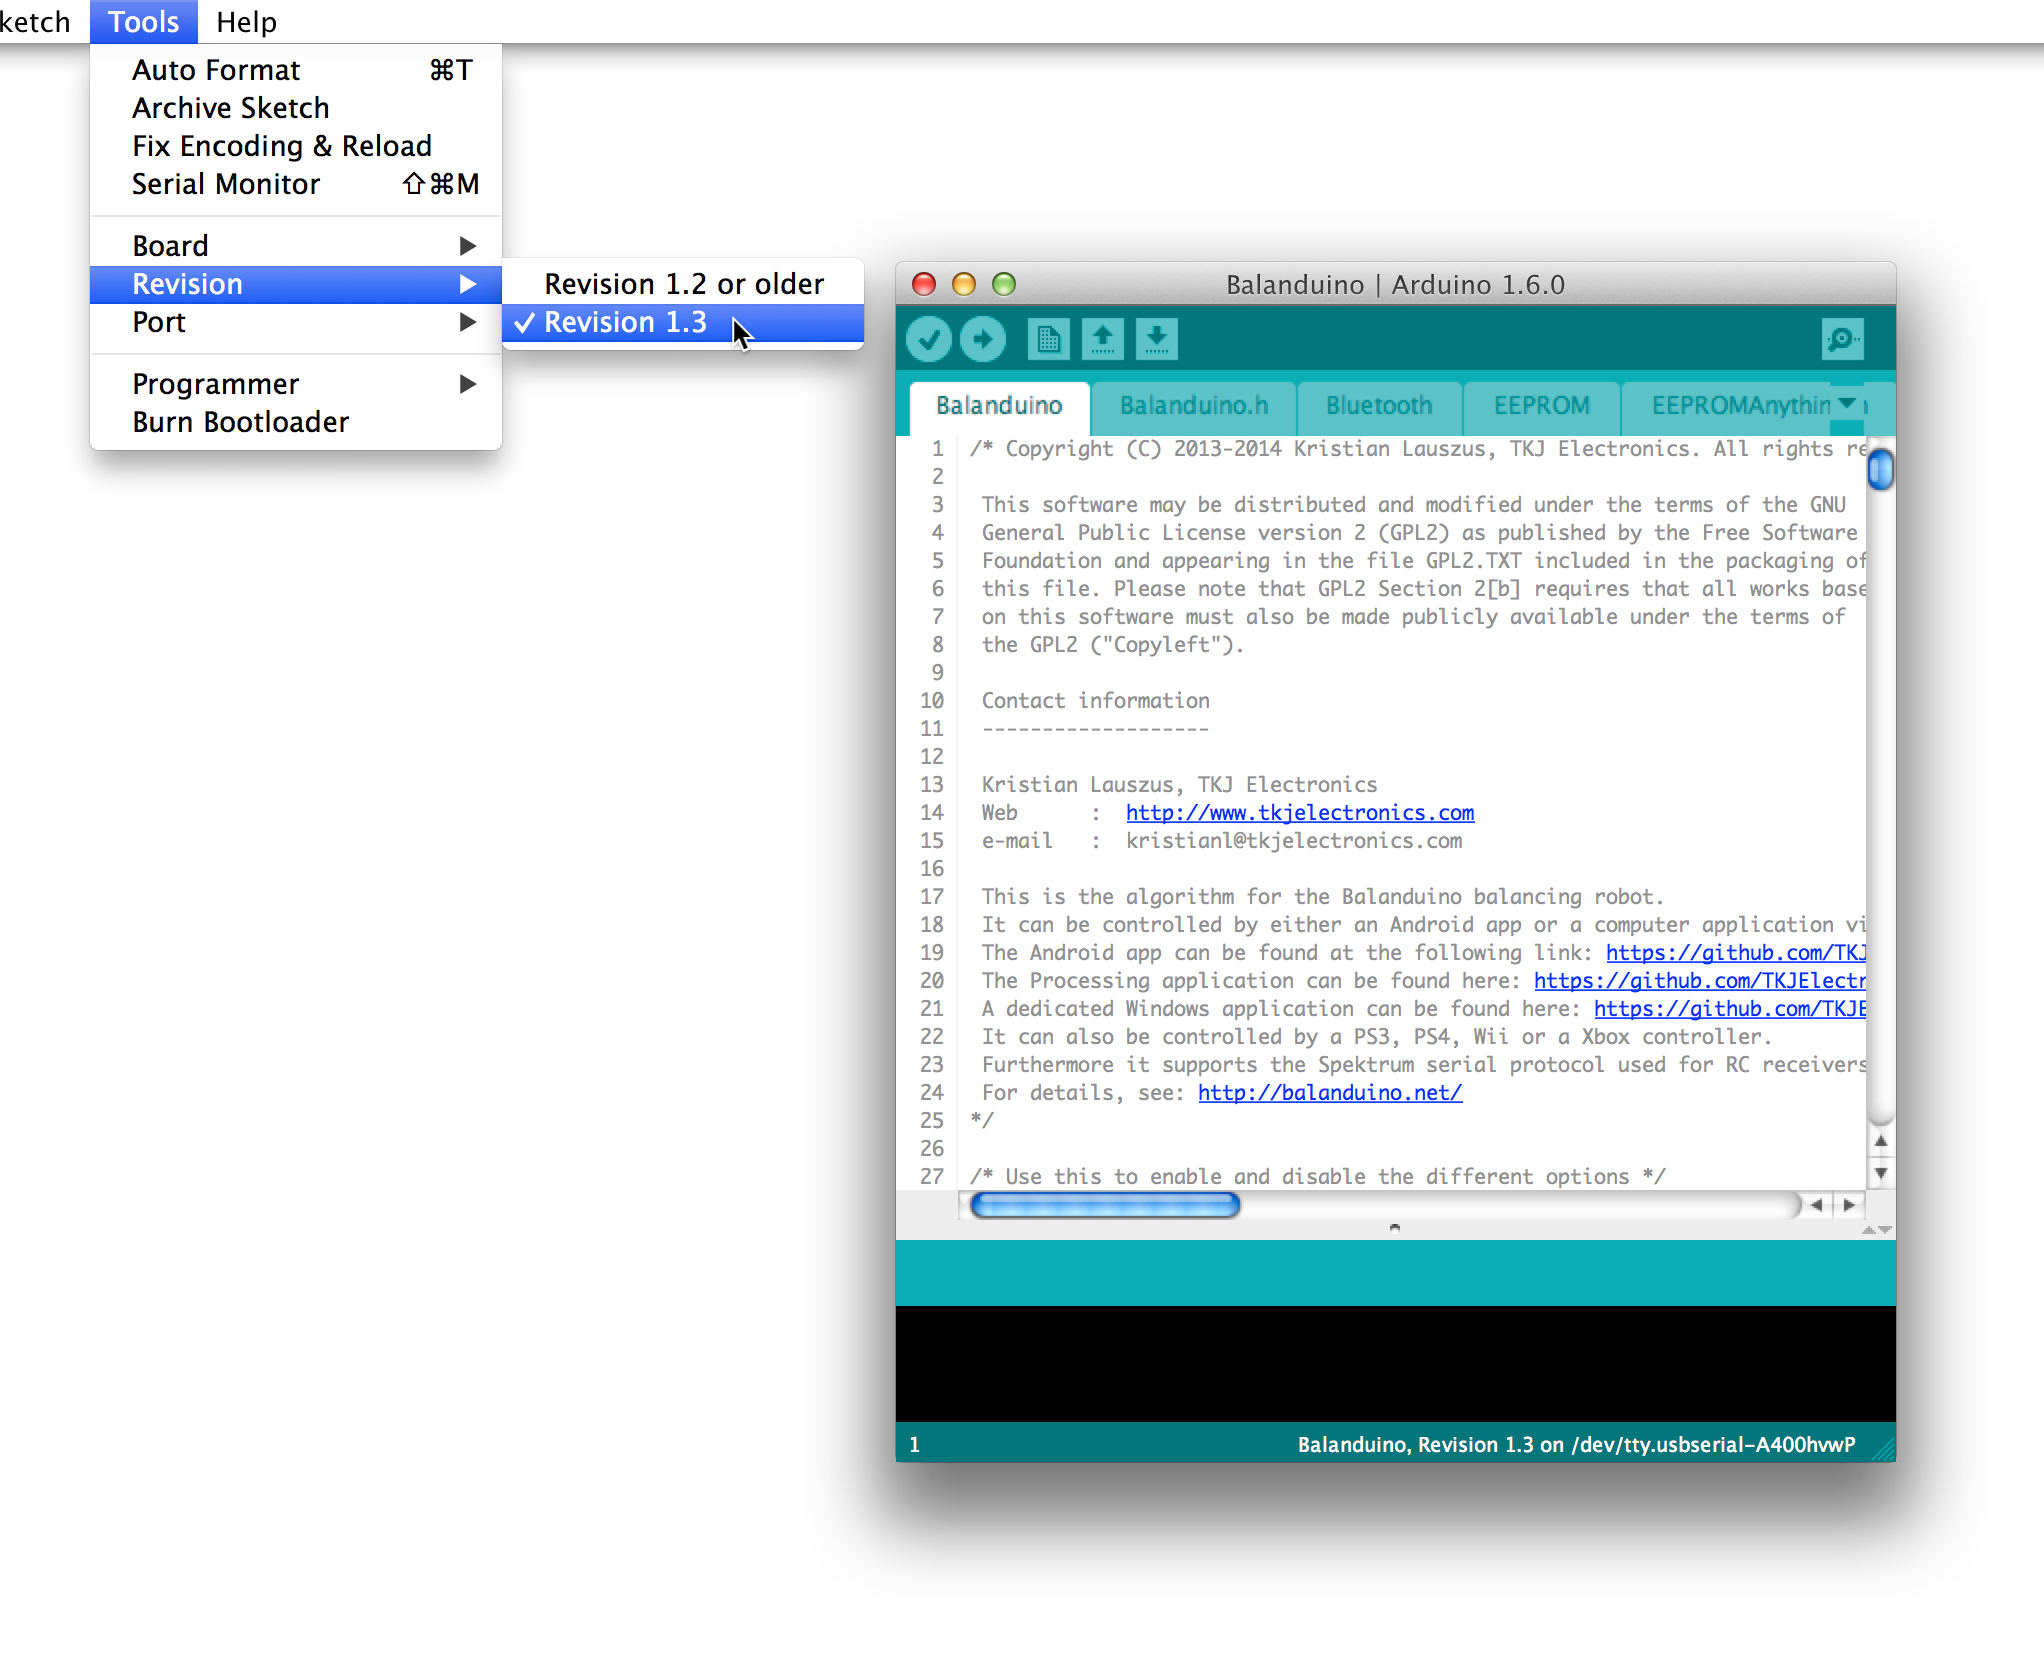
Finally you need to open the file called 'Balanduino.ino' with the Arduino IDE. The Arduino IDE should now open and you should be able to select the Balanduino as shown below. You will also need to select the revision according to the number printed on your PCB.
Connection and upload
Now it is time to connect the Balanduino to your computer by using a standard USB A to USB B cable.
First you will need the FTDI VCP drivers. This will allow the Balanduino to appear as COM port on your computer.
Now please quit and reopen the Arduino IDE. You should now be able to select a newly appeared Serial port in the Tools menu.
You can now press the Upload button and the LED's on the Balanduino main board should start blinking to indicate the Serial transfer. If the upload is successful the Arduino IDE will print 'Done Uploading'.
Pairing
Last step is to pair the robot with your favorite game controller, Android phone or your Windows, Mac or Linux based computer.
Please read the Pairing guide on the Wiki for further details about this.
Congratulations
This concludes the short 'Getting started guide' where you should now be able to upload new firmware updates or even your own code to the robot.
Be sure to watch our GitHub repository so you will get notified whenever changes are made.
If you have any questions or comments please visit the forum.
The source code and all the other materials are available on Github. Click the button below to check it out. Be sure to click watch in the top right corner to get notified whenever changes are made.
GoLatest GitHub pull
The easiest way to get all the latest content from our GitHub repository, including source codes, schematics, PCB layout etc. is to download the daily pulled ZIP-repo file.
Click here to download ZIP-repo