After the last B-ROBOT project, this is what I’ve been doing the last months…really fun…
Check the new and improved version of this AIR HOCKEY ROBOT!
Everything started when I built my 3D printer. First, the posibility to design and build my own parts and second, how could I hack the components of a 3D printer to make something different? I have seen several interesting projects of robots that paint or manufacture PCBs, etc … but I was looking for something different… My daughter loves the Air Hockey game and I love robotics so one day an idea was born in my mind… can I construct…??… Mmmmm …. it seemed very complicated and with many unresolved questions (puck detection??, robot speed??), but that is also part of the fun…
 WHAT IS THIS? HOW TO CREATE ONE?
WHAT IS THIS?
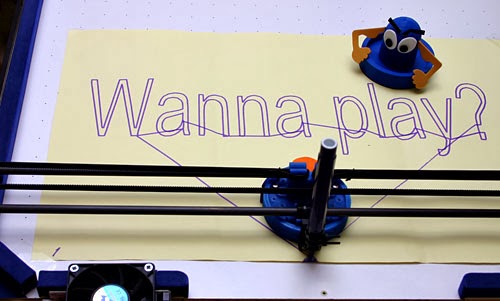
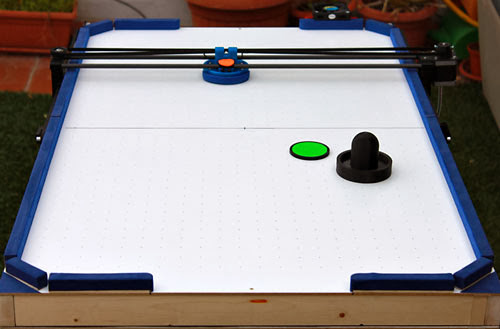
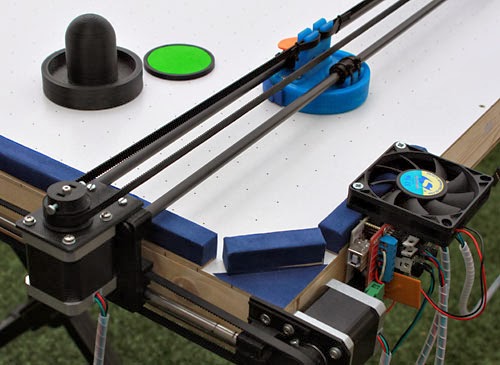
Based on the idea of using standard RepRap 3D printer parts : NEMA17 stepper motors, drivers, Arduino Mega, RAMPS, belts , bearings, rods, printed pieces … I started to develop the project. The main advantage of using these parts is that they are cheap and easily available. First I started with the construction of the air hockey table. I chose a medium size (my house is small, ;-)) I wanted something easily transportable but comfortable to play with. The final dimensions are 100x60cm. I bought some wood boards and wood slats and began to mount the table. First I started to build an airless version but it really lacked the feeling so I decided to make a table with air. I tried different possibilities until I tested a very simple combination with 2 old PC fans that works very well. I made the table holes (it seemed like hard work but it was not so bad) and then I had a fully playable Air Hockey table! Time to play!!
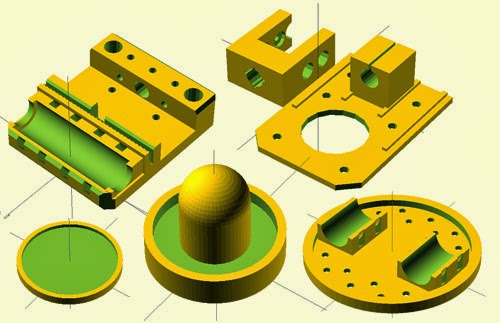
While I was designing the robot parts, I created two different designs: one H-Bot, and another one with 3 motors. In the end I decided to use the 3 motor design (2 for the Y axis and one for the X axis). After several design iterations of the pieces, and some material changes to minimize the weight and inertia (and thus increase the accelerations of the robot) I got a fairly operational design. One of the most important changes has been the replacement of the X axis rods with carbon tubes ones (from kites) ,which work very well on PLA printed bushings and save a lot of weight.
if you want to print the 3D parts yourself of the NEW Air Hockey Robot EVO: Thingiverse
HOW TO CREATE ONE?
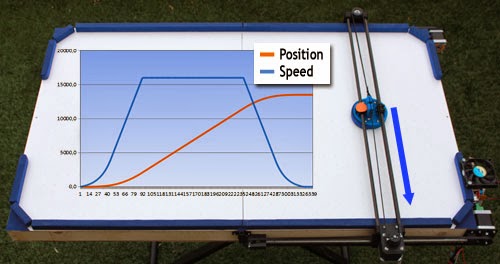
The code: I started studying the code of Marlin ( typical RepRap firmware) software but I decided to start from scratch, first because I don´t need a gcode interpreter and second because the software of a 3D printer has a motion planning algorithm and this is not the way the Air Hockey robot must work. 3D printers plans movements for smooth paths through all the points. The Air Hockey Robot should move inmediately with every new command canceling the previous one, because what we need is that the robot moves as quickly as possible to the new position. I began developing the driver for Steppers motors using Arduino interruptions and making the code as efficient as possible. I implemented position, velocity and acceleration control, using an acceleration ramp with a simplified S-profile. The interrupts can generate pulses up to 25Khz which is the maximum speed that I can achieve with the steppers. The position control works at 1 kHz.
Check the new Air Hockey Robot EVO KIT!
ALL YOU NEED TO CREATE (AND MODIFY) YOUR AIR HOCKEY ROBOT!
ALL YOU NEED TO CREATE (AND MODIFY) YOUR AIR HOCKEY ROBOT!
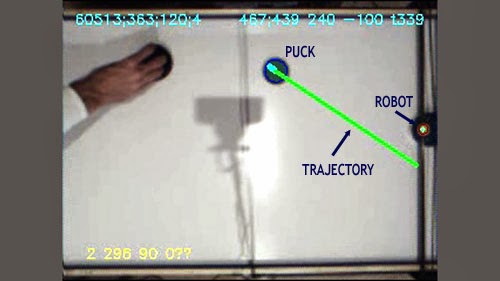
For the puck detection problem I decided to use a computer vision system. Initially I planned to use the CMUCAM5 (Pixy) sensor that fits very well in this project (and I will prepare a version for this sensor in near future), but the camera is not available yet, so I started a new route: Using the PS3 EYE camera with a PC to develop the vision system. I developed the vision system in C language using OpenCV libraries for capturing, threshold, filtering and segmentation. The system detects the puck (wich must have a special color) and the result is sent to the Arduino by serial port. The vision system sends information packets containing the position of the puck and the robot in pixels within the image. The camera is running at 60Hz at a resolution of 320×240. Fortunately the camera has very little distortion and I don´t need to implement a lens distortion correction. The software records a video on the PC which is very useful for debugging.
One of the main problems I’ve had is that the power of the NEMA17 motors is pretty fair for this project and the disadvantage of using stepper motors is that if we lose steps (which can easily happen, for example when the robot hits the puck against the wall) and if we do not take into account the missing steps we lose the position of the robot. To fix this, what I’ve done is to use the vision system to also detect the robot (with a different color) so we can detect when the robot has missed steps and fix it.
What remained was the implementation (in the Arduino) of the trajectory prediction system and the strategy of the robot. Once we have detected the puck in two consecutive frames we can calculate the trajectory (equation of the line through two points, this is school Maths!). The trajectory prediction takes into account that the puck could bounce off a side wall. All these calculations are accessible to the strategy subsystem that decides what the robot will do: defense, defense+attack of prepare a new attack.
A nice part of this project is that the Strategy subsystem is fully insulated and is very easy for everyone to modify this part and program their own strategy algorithms isolated from the complexities of motor control, vision system and prediction code. The strategy is what makes the robot win or lose!, so we will see Air Hockey robot competitions in the future? Although it may seem a complex project, it´s an affordable and doable project.
Code repository, 3D designs, documentation link: GitHub
- Detailed build Instructions link: Build manual
-
AIR HOCKEY HACK 3D MODELS (STL format)
(*) The build manual contains high detailed photos of the project
Some other considerations that have been taken into account during this project (and for the future):
- The project is reproducible: Easy to get materials, documentation, open source code and open hardware …
- The robot is removed completely from table with only 6 screws. So it can be removed to play or be transported
- It’s very easy to adjust the level of the robot, for example to play with children, just turn down the acceleration and maximum speed of the robot (this could be improved in the future)
- Currently the robot is not able to detect goals but we could improve this in future.
- In future the robot can self-calibrate the camera by using predefined movement at the beginning (to avoid camera calibration).
- We could mount two robots per table, one on each side. Competitions between robots?? Compare different strategies in a tournament? …
- It’s a great and fun project to teach science, specially for childrens:
- Concepts of Physics: Friction, continuous and uniform motion, rebounds, concepts of position, speed and acceleration
- Mathematical Concepts: Equation of the line through two points, prediction, XY Cartesian System
- Robotics: Motors, Machine Vision, Control, Arduino
- DIY Philosophy: Build your own Air Hockey table
- Hacking: Using 3D printer parts to build something completely different.
What is the current robot´s skill? Well, now the robot could easily beat a child. An adult with some experience (myself, lol) can still beat the robot, but I am sure that with some more small improvements it is going to be really hard to beat … The project is fully alive with undergoing improvements, both in code and the robot … all contribution to the project are welcome …