Two exciting new features for PolargraphSD. Both of them rely on the new roving area facility. This is essentially nothing more than a way of specifying a drawing “live” area, and telling the machine. Previously the machine has had very little concept of state, and (more-or-less) just did what it’s told. Now, by setting a rove area, we can tell it to limit its behaviour to just that area.
Both of these features are very GOOD ones.
How to rove.
Most of the roving functions are hidden away on the roving tab, but it shares buttons with input. Define a area on-screen by dragging a selection area, or selecting the frame. Now just press send roving area and a new command is sent off that sets this in the machine’s live memory. This area is volatile, so if you reset, you’ll need to resend.
Vector sprites.
A vector sprite is nothing more than a small vector design, but instead of existing in the coordinates system of the machine, it has its own coordinates system. So when I have made up a font with each letter being one sprite, each letter has 0,0 at the bottom-left point. Capital letters are 1.0 high, and around 0.4 wide. What unit these values are measurements of is irrelevant, because the machine can now scale them to any size, and draw them anywhere, and rotate them to the four cardinal native polargraph directions.

Vector sprites will be able to be lots of things in the future, but the first application is writing text.
- Choose your rove area by selecting an area and clicking send roving area.
- Choose whereabouts in the rove area you want the text to start by clicking start text at point and clicking somewhere in your rove area. The gondola will move to that point on the machine and wait.
- Click render writing to bring up the writing dialog:
 Type in your text or load it from a text file using the button. For now, it can only draw in a south-east direction.
 - Notice that there’s a file prefix here. This tells the machine to find the sprite font files on the SD card in a subdirectory called sprite, and that the files themselves will be prefixed with let (for letter).
- Hit generate commands and see that each character has been converted to a new command:
 The C39 commands tells the machine to draw a sprite from a file on the SD card, at the current machine position, and scaled 80x.
In this case, these are letter form files, and there’s loads of them which is why they get their own directory on the card. And because this is being done in the context of writing, then the machine knows that if it finds itself outside the rove are, then it knows how to work out where to start the new line.
The grid size sets the text row height, and the pixel scaling controls how big the actual letter forms are scaled within those rows.

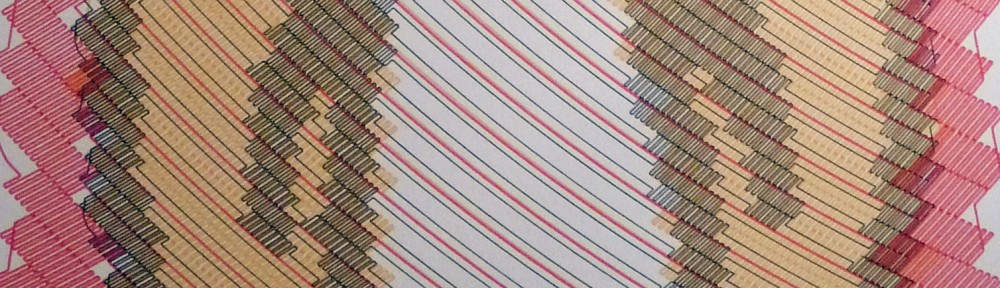
In practice, this has the ring of Jack Torrance to it, which is nervously apt. It’s possible to read fragments, but because each line is longer than the last, and because of the curve and the distortion, it’s almost impossible to figure out how the lines follow on from one another, and very easy to lose track. Quite disorientating to try.
For this to work you need to copy the sprites folder onto your SD card.
Get the new code, controller and things from the repo
Polargraph 1.2 Controller source code
Polargraph server for polarshield source code
Or in the binaries bundle. I put the mac and the pc version in together – let me know if there’s any problems with doing it this way.
The other new feature is actually more significant, but a bit more simple:

Norwegian pixel FTW. I’ll write some more about that tomorrow, because it’s bedtime now.
Hi Sandy,
is this sprite feature just avalible for the PolargraphSD or is there a possibility to get it working on a tethered polargraph too?
Stephan
Stephan for the moment it’s for polargraphSD only I’m afraid, because it needs the local storage of the SD card. There’s no technical reason why something like this couldn’t be implemented in the controller. I’ve been reluctant to put much vectory functionality into the controller though, because there are other tools available that do that work much better than I ever could (eg inkscape), so you’d be best off just producing your artwork as SVG, and then importing that as a vector file.
The only reason I think I’d want to make it part of the controller is because it seems all fonts on PCs are outline fonts, and they don’t always work very well with the polargraph. It needs stroke fonts, and they are very hard to come by. That said, inkscape hs some plugins or extensions for the eggbot, and eggbotters have very much the same issues as polargraphers, so there are some stroke-font solutions that have come out of that.
Pingback: Polargraph/V-plotter review - Loess.ru