Sliding Rail Kit
📅Update: 2020/09/30
3) Integrate Sliding Rail Kit into your project.
Read the Installation Guide to check the items, assemble the sliding rail and set up for the first use.
We're working on integrating the sliding rail and conveyor belt kit into Rotrics Studio's basic panel and Scratch command block. It's planned to be released in late-October.
Before that, we can use G-code commands to control the sliding rail's movements. Or we can use the sliding rails for drawing and laser engraving.
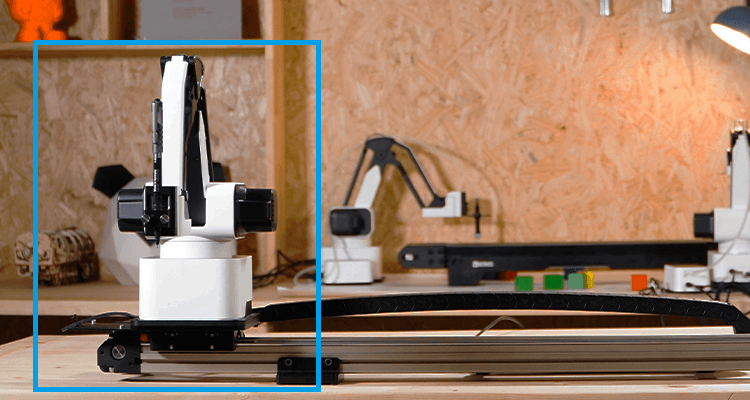
Move DexArm to the motor end of the sliding rail and then power on.
Then send command M2005 to initialize the sliding rail: with command M2005, the machine will automatically update the "axis_steps_per_unit" of the E axis, meanwhile, the sliding rail will move to its home point through stallguard and sensorless_homing of TMC2209.
Now, we can start controlling it with G-code commands. We can use the G1 Exx Fxx command to control the sliding rail since it's been connected to the 12-pin motor port.
;G1 Exx Fxx - move sliding rail xx mm at speed xx mm/minG1 E100 F2000; move sliding rail forward 100mm at speed 2000 mm/min
🧙♂ The recommended speed range is 2000 - 5000 mm/min
We provided a sample svg file for you to experience drawing with the sliding rail. Click the link below to download it.
Step 1: Set up drawing board and sliding rail.
Put a 1 meter long board below DexArm and stick a paper on it.
Move DexArm to the center of the drawing paper and POWER ON.

Tips: it's recommended to stack the board up to the Z0 height of DexArm so that we can get the biggest working area.
Step 2: Import it to Rotrics Studio's drawing panel.
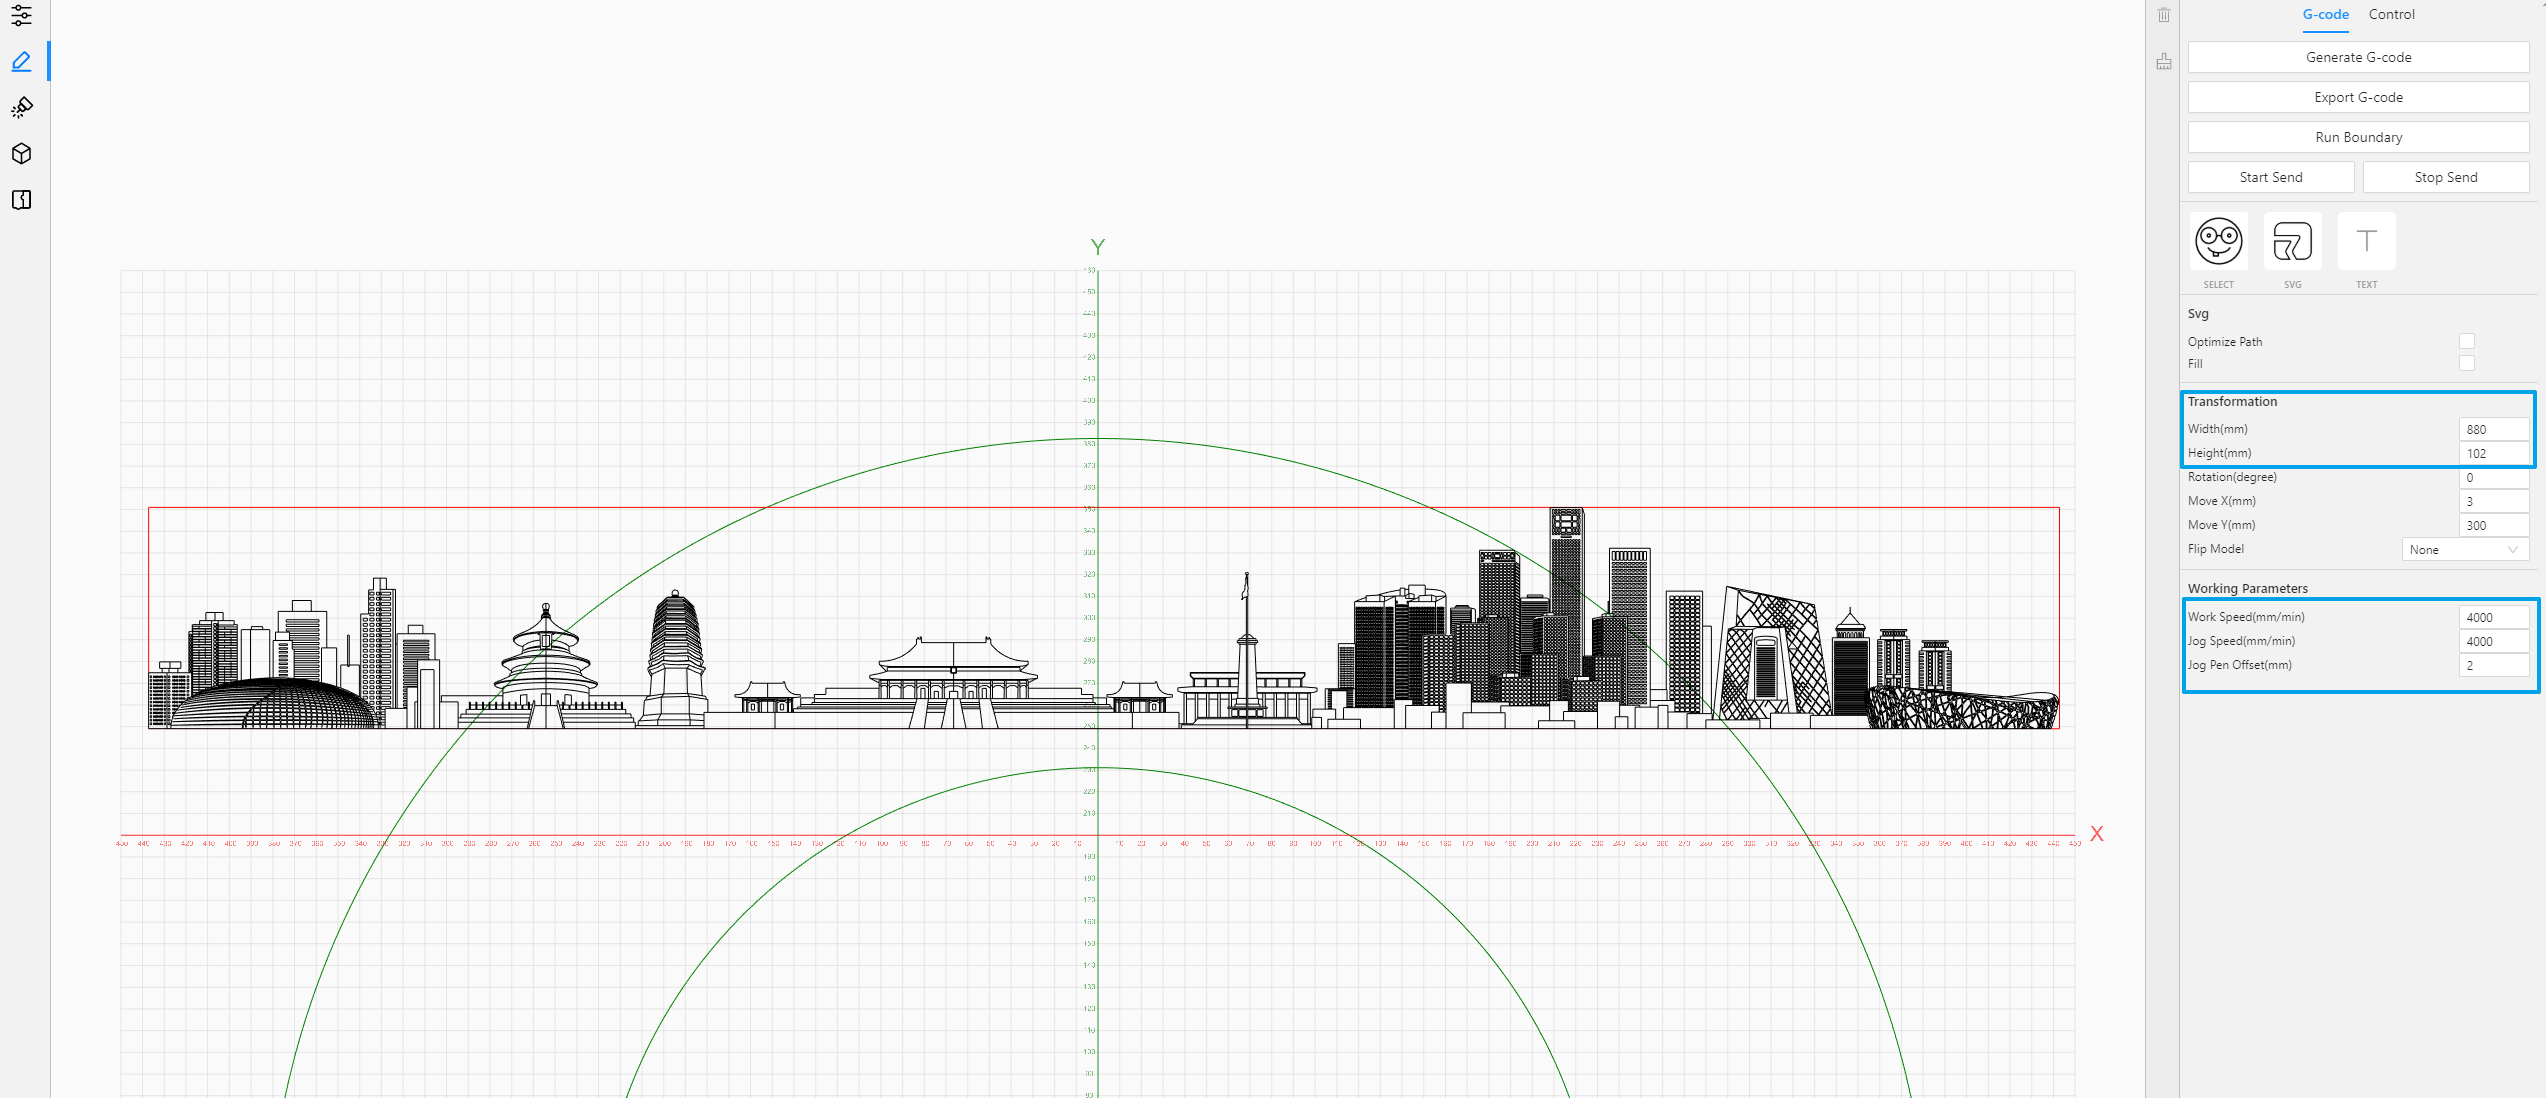
Step 3: Change the working parameters👇
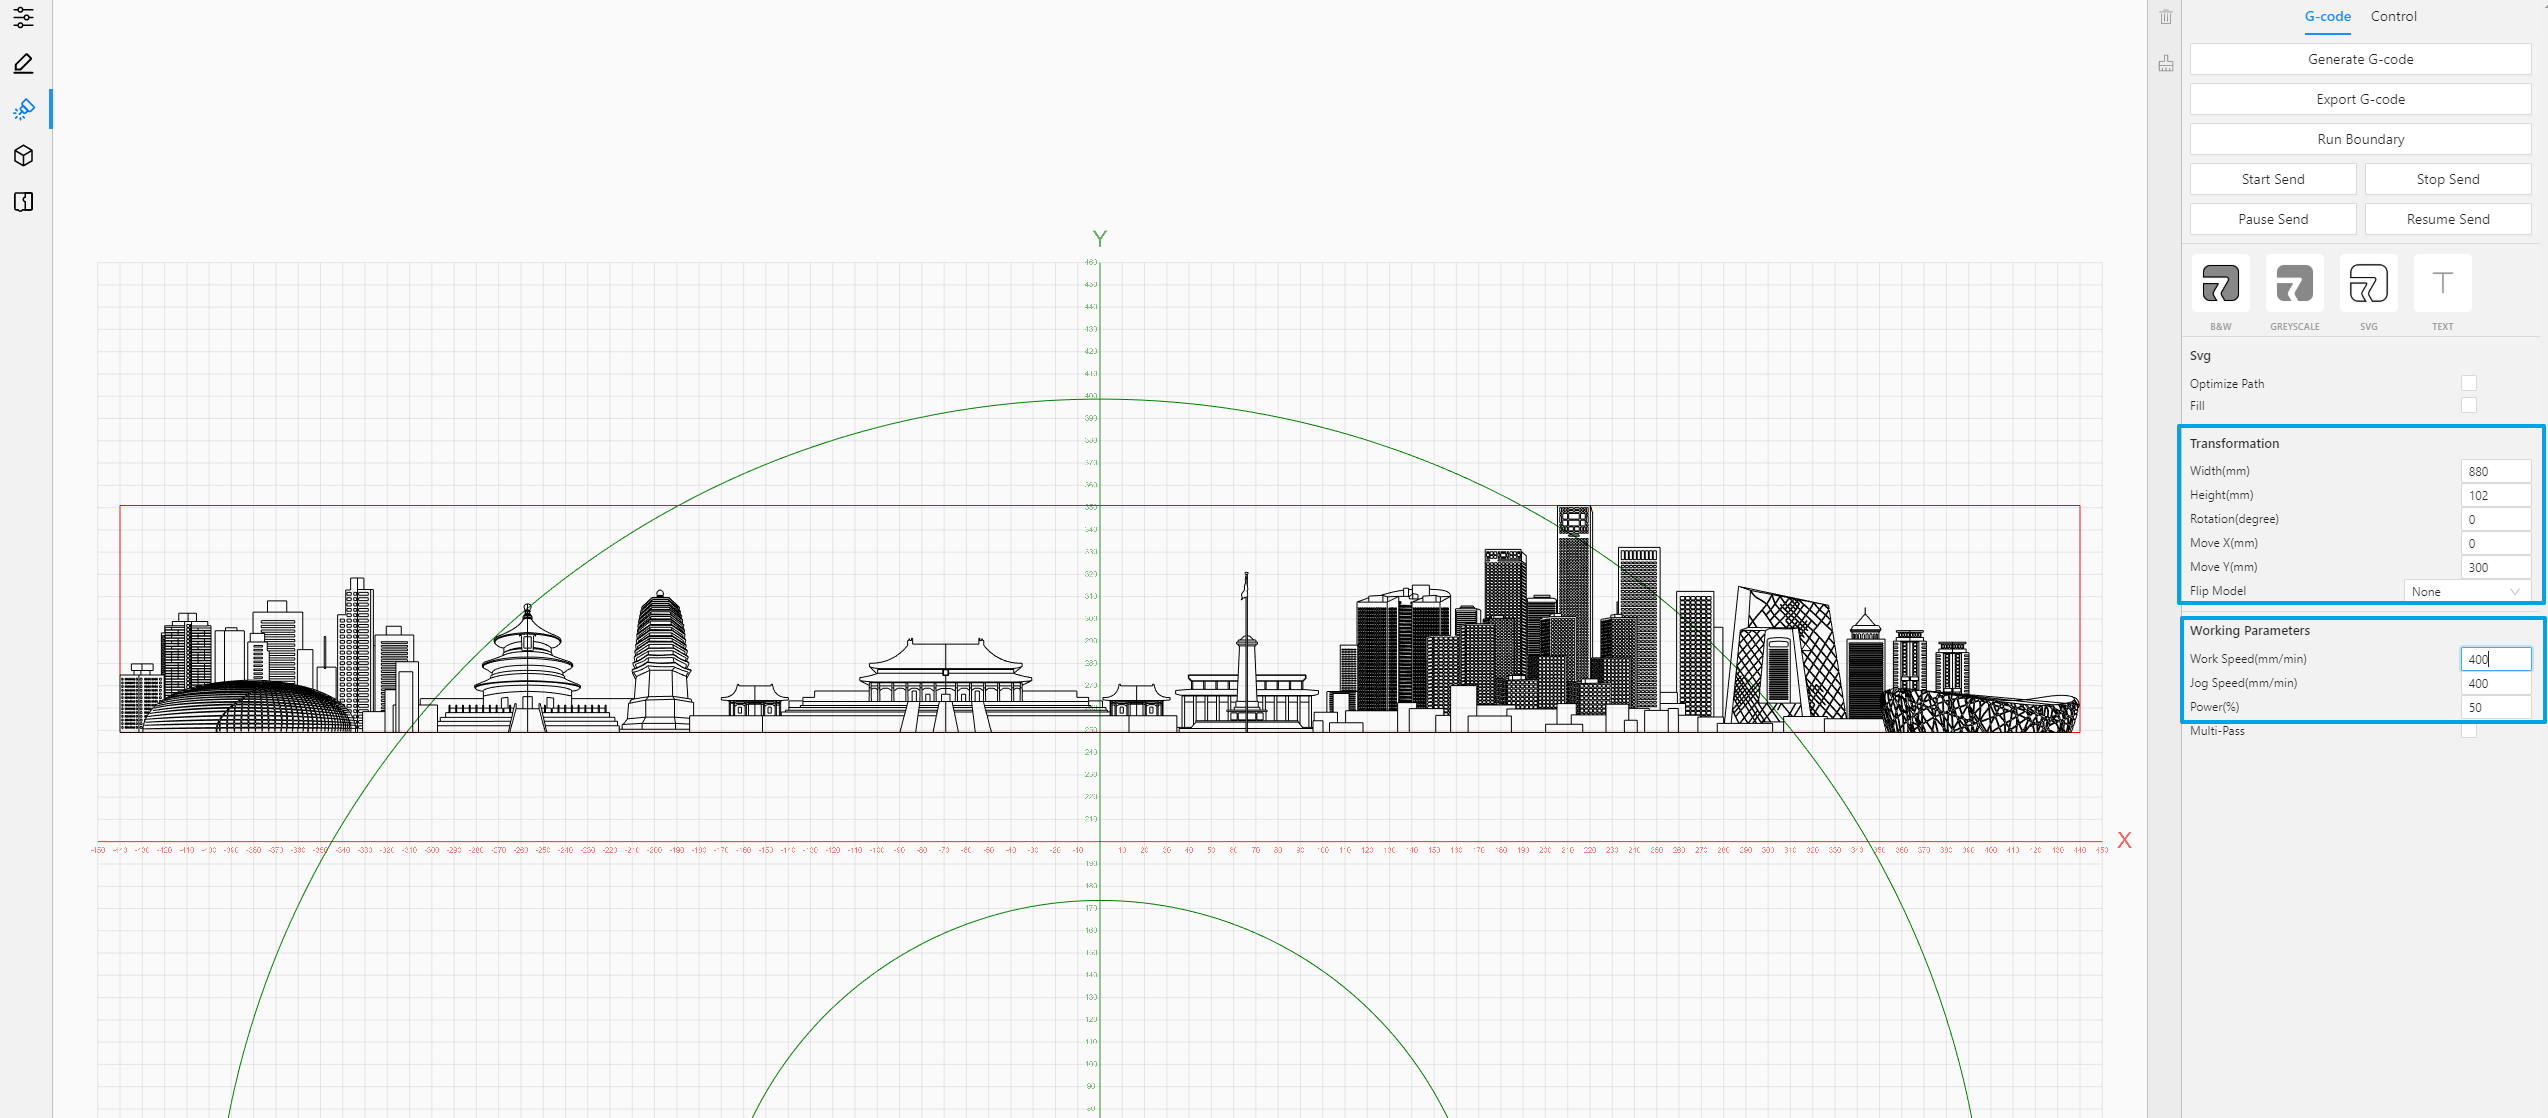
Width: 880mm
Work Speed: 4000
Work Acceleration: 200 (Set it in Terminal by sending M204 S200)
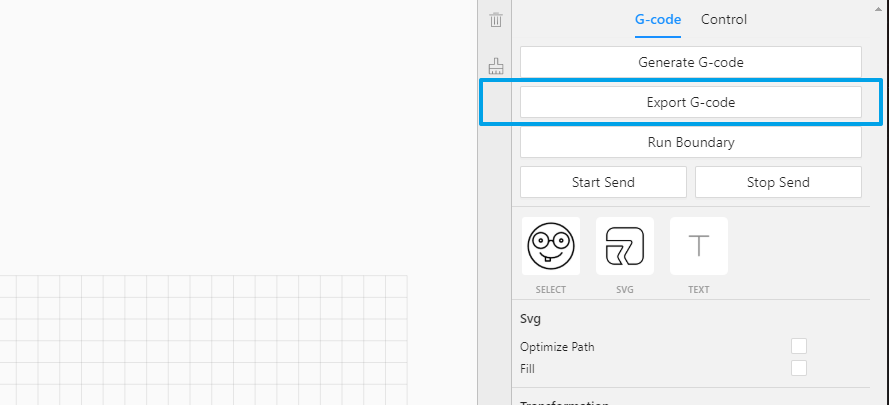
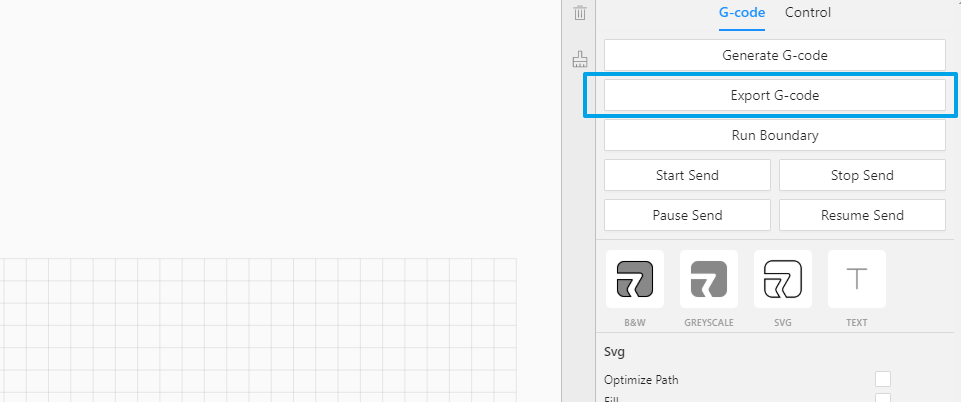
Step 4: Export the gcode file.
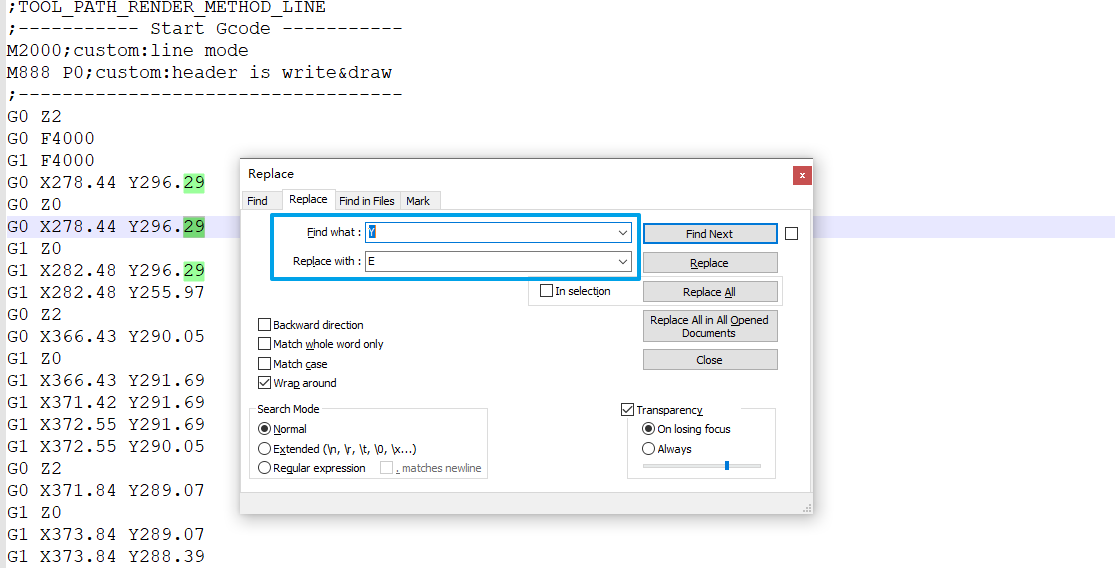
Step 5: Open with a notepad software, replace ALL Y to E.
Step 6: Save and import the file to Rotrics Studio's Basic panel.
Step 7: Set work height and start drawing.
❗ Warning: This is an experimental feature! Make sure you are waring Safety Goggles thorough the whole process.
Step 1: Set up laser material and sliding rail.
Place a long material below DexArm and focus the laser module. Move DeArm to the center of the material.

Step 2: Import the SVG file above into Rotrics Studio's laser panel.
Step 3: Change the width to 880mm and set your common working parameter.
Step 4: Generate G-code and export the file.
Step 5: Open it with a notepad software and replace ALL Y to E.
Step 6: Save and import the file to Rotrics Studio's Basic panel.
Step 7: Set work height and start engraving.
Just like controlling DexArm, we use G-code commands to control the sliding rail's movement as well.
After setting up the sliding rail kit, send the G1 Exx Fxx command via serial and you can control the movements.
;G1 Exx Fxx - move sliding rail xx mm at speed xx mm/minG1 E100 F2000; move sliding rail forward 100mm at speed 2000 mm/min
🧙♂ The recommended speed range is 2000 - 5000 mm/min
Learn more about DexArm's API here👇