
Get Help
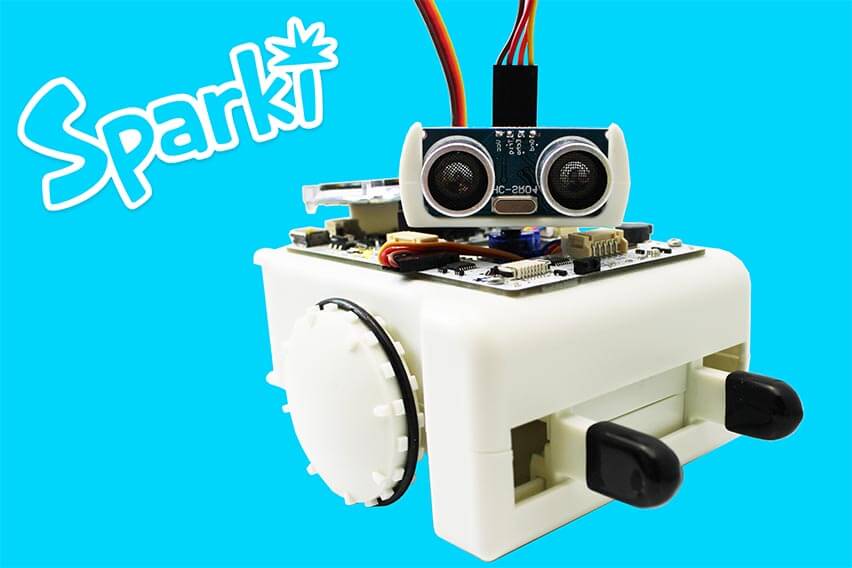
Sparki + Android™: Introduction
Introduction
In this lesson we will learn how to control a Sparki from an Android™ mobile device.
The Android robot is reproduced or modified from work created and shared by Google and used according to terms described in the Creative Commons 3.0 Attribution License.
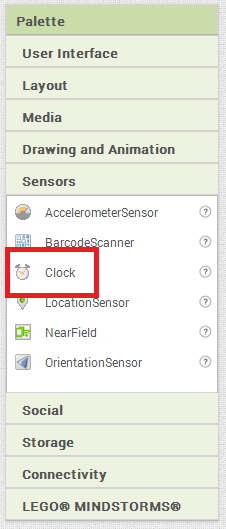
For this purpose we will also learn the basics of MIT’s App Inventor, a free and easy to use graphical programming environment for Android™: But before digging in Android™ programming, please be sure that you understand the basic concepts of Sparki’s Bluetooth and Serial communications. Also, we are going to make extensive use here of the programs explained in the Computer Inputs lesson.
What You’ll Need
- A Sparki.
- The Bluetooth module (included with the Sparki).
- An Android™ device (more about device compatibility in the next section).
- A working internet connection (since App Inventor runs in the cloud).
- If you are going to use a WiFi connected Android™ device (more on this below in this lesson), you will need a WiFi router/access point connected to the internet. The computer that you will use to run App Inventor has to be connected to the same WiFi connection as your Android™ device.
Device compatibility
To ensure that the examples on this lesson works with a wide range of Android™ devices, we have tested everything with an small Android™ cellphone running Android™ 2.3.6. So, newer Android™ versions should work even better, but we did not make exhaustive testing, nor we ensure device compatibility of any kind. The examples provided here are for the purpose of only demonstrating a possible way of Sparki’s usage with some mobile devices. Finally, we have included a small troubleshooting section at the end of this lesson with some tips to avoid common problems that we have found when working with some Android™ devices.Connecting Sparki to an Android™ device.
##Under construction.Getting Started with App Inventor
The easiest way of setting up an Android™ device to work with App Inventor is by using a WiFi connection, as explained here. This is the way that we have tested and worked with to create the examples on this lesson. ##Under construction.First Example: Moving the Robot
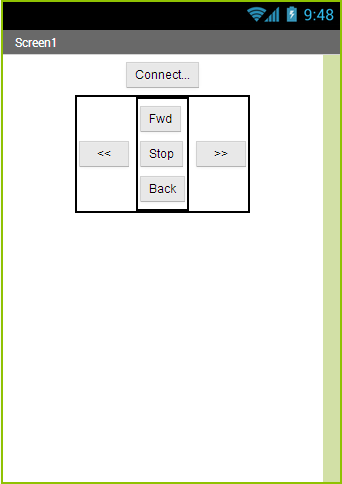
Let’s start by a simple serial remote control example using Sparki’s Bluetooth module. Before starting the work on the Android side, please upload to your Sparki the following sketch using the SparkiDuino software. This small program is nothing else than “Asynchronous Events” example from the previous Computer Inputs lesson, with the modifications to work with the Serial1 (Bluetooth) port:
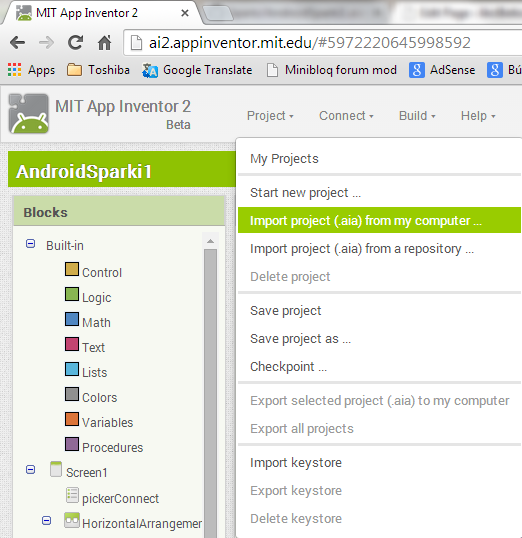
 If you are impatient and want to start playing around with the app before we learn how it works, you can download the complete source code here:
 Now, let’s see how it works…
##Under construction
Now, let’s see how it works…
##Under construction
 ##Under construction
 ##Under construction
 ##Under construction
 ##Under construction
 ##Under construction
 ##Under construction
 ##Under construction
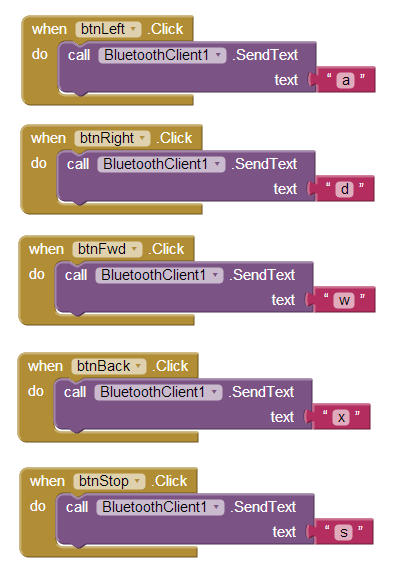 To understand the commands that we are sending with the previous code, please remember the code inside Sparki which interprets these simple one character instructions:
|
1 2 3 4 5 6 7 8 9 10 11 12 13 14 15 16 17 18 19 |
switch ((char)inByte) { //Actions: case 'w': sparki.moveForward(); break; case 'd': sparki.moveRight(); break; case 'a': sparki.moveLeft(); break; case 'x': sparki.moveBackward(); break; case 's': sparki.moveStop(); break; [...] |
Reading Sparki’s Ultrasonic Ranger
##Under construction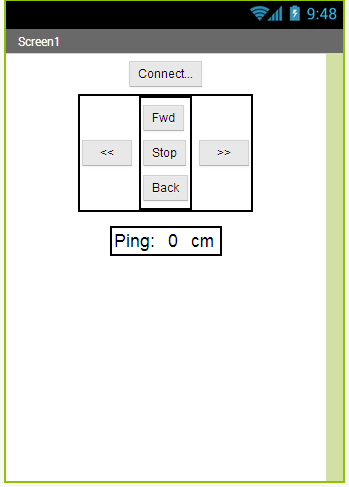 Before continuing, we will use a slightly modified firmware on the Sparki side for this example. So we will just comment some parts of the previous program and modify a bit the code related to the ping sensor’s value sending through the serial connection:
|
1 2 3 4 5 6 7 8 9 10 11 12 13 14 15 16 17 18 19 20 21 22 23 24 25 26 27 28 29 30 31 32 33 34 35 36 37 38 39 40 41 42 43 44 45 46 47 48 49 50 51 52 53 54 55 56 57 58 59 60 61 62 63 64 65 66 67 68 69 70 71 72 73 74 75 76 77 78 79 80 81 82 83 84 85 86 87 88 89 90 91 92 93 94 95 |
#include <Sparki.h> // include the sparki library //#define serial Serial #define serial Serial1 int edgeThreshold = 200; void setup() { serial.begin(9600); // necessary for the Bluetooth. sparki.servo(SERVO_CENTER); } //Send an asyncronous event to fire an alarm on the computer side: void processEvents() { if (sparki.ping() < 5) //If the robot is going to crash against and obstacle, send this message! { serial.println("obstacle!"); } if (sparki.edgeLeft() < edgeThreshold) //if an edge is detected, send this message! { serial.println("leftEdge!"); } if (sparki.edgeRight() < edgeThreshold) //if an edge is detected, send this message! { serial.println("rightEdge!"); } delay(20); } void loop() { //Process the asyncronous events: //processEvents(); //Receives commands from remote computer: if (serial.available()) { int inByte = serial.read(); serial.println((char)inByte); switch ((char)inByte) { //Actions: case 'w': sparki.moveForward(); break; case 'd': sparki.moveRight(); break; case 'a': sparki.moveLeft(); break; case 'x': sparki.moveBackward(); break; case 's': sparki.moveStop(); break; //Sensor readings: case 'p': serial.print("<p="); serial.print(sparki.ping()); serial.println(">"); break; /* case '0': serial.print("eL="); serial.println(sparki.edgeLeft()); break; case '1': serial.print("lL="); serial.println(sparki.lineLeft()); break; case '2': serial.print("cLr="); serial.println(sparki.lineCenter()); break; case '3': serial.print("lR="); serial.println(sparki.lineRight()); break; case '4': serial.print("eR="); serial.println(sparki.edgeRight()); break; */ } } } |
##Under construction
 ##Under construction
 ##Under construction
 ##Under construction
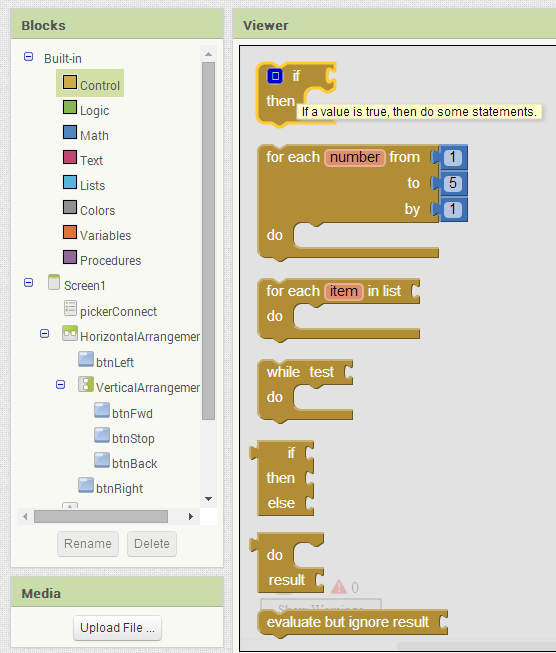
Here is the App Inventor code:
##Under construction
Here is the App Inventor code:
Making a Better Android™ Application
##Under construction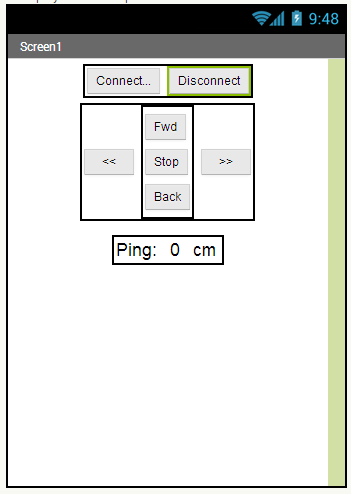 ##Under construction
Here is the App Inventor code:
##Under construction
Here is the App Inventor code:
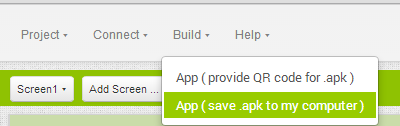
Building an .apk File and Deploying It
If you want to upload your own application to Google Play to share it not just as an App Inventor source project, but as an app available on that online store, here are the instructions. Once you have registered and followed the required steps, you will need to create an apk file. This can be easily done by selecting the Build->App (save .apk to my computer) menu in App Inventor: