I got a pile of boards back from the maker recently: Polarshield v2.4 (https://github.com/euphy/polarshield_hardware). Here it is alongside the 2.2 version (on the left) to show the progress.
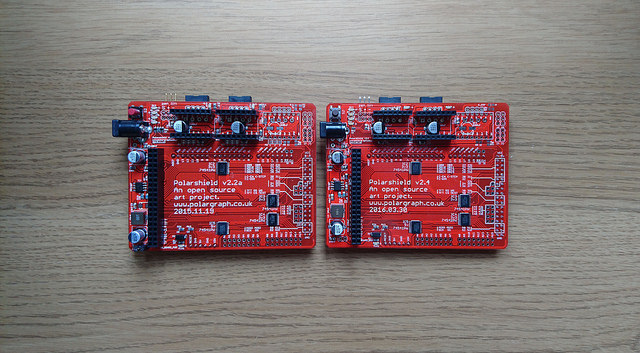
Not much right? There’s no revolution, indeed, but a couple of minor changes that makes it easier to build.
- More surface mount parts. The tactile switch in the top-left is now surface mount. SMT parts are just quicker to work with.
- Moved the microstepping jumper solder pads to the back of the board, and freed up a load of space.
- Squished four of the 1k resistors into another 4-row resistor network. This is the smallest part I’ve ever used, 2x1mm, you can barely see them on the picture. There’s one between the two motor driver sockets, and there’s another below the stack of LEDs on the top-left. This makes pick-and-place much faster. I’m not convinced the super-high density was a good idea though – it is far less tolerant of sloppy placing / solder paste application. We’ll see.
- Better designed for soldering with hot air, and iron. Some of the traces on the board were sometimes difficult to heat effectively, without also over-heating the component. The electrolytic capacitors were particularly problematic. I’ve routed the traces less efficiently in some cases, so that they have more copper that I can heat with the hot air pencil.
- LEDs are all orientated in the same direction. The old board has them pointing everywhere, so I was always spinning the board around. v2.4 has the anode to the right-hand side in every case. It’s to reduce the chance for placing errors.
- The holes for the DC power jack are placed off-centre, so the solder tabs are a friction fit. It makes the part self-aligning. Nice work sparkfun!
And the great thing is, it works, ha!
I’ve been taking some time off the Polargraph shop lately, because of work pressures and a couple of other things. It’s been really nice not to have to rush to the workshop every hour of the day to keep on top of things, and I’ve been able to do a little development here and there.
I think I’ll be back eventually, but maybe in a couple of weeks, and I might try a different manufacturing pattern.
