Open for business again!

Pre-order Polargraph SD machines!

Gutenberg Bible page drawn out by a polargraph machine

I’ve opened a little shopfront – polargraph.bigcartel.com – and am taking pre-orders for the first round of Polargraph SD machines, as well as orders for the regular machines.

The pre-orders are offered at a significant discount (will be something like 20 or 25%), because you’ll have to wait until June to get them – not finished designing them yet you see, but I know more-or-less what they’ll be like.  And that is:

  • MEGA-based, so plenty of memory for future software expansion.
  • Tethered (USB) OR standalone drawing.
  • I/O pins broken out so usable by home-brew hacks (eg bluetooth).
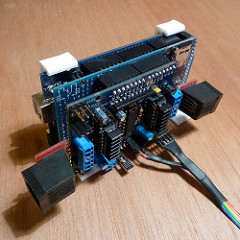
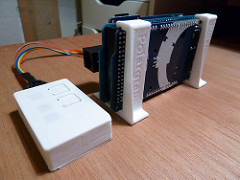
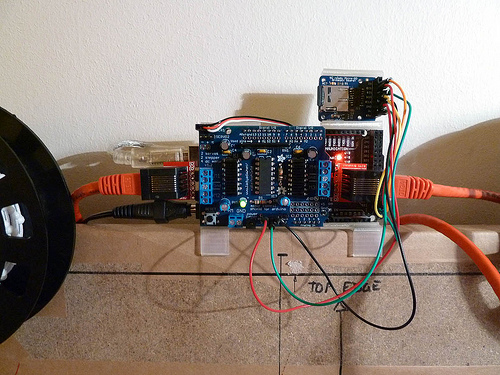
  • Useful hardware interface for standalone drawing.  At the very least this will be a neater version of the machine featured previously on this blog, but it will hopefully be something a little more sophisticated…
  • The level of “custom” will depend on number of orders, from a hand-soldered prototype shield to a specially made PCB, but will be made to a high standard.
  • There might be enhancements to the gondola and the brackets and things too, depending on how much money I have to work on prototypes.
  • And all the same stuff as you’d find in a regular polargraph kit (gondola, brackets, motors, sprockets, cord, cables, psu, servo).

I will be finalising the design during April, and sourcing and assembly during May.  The pre-order price will last until the end of April.

Those of you who are interested in just the extras (the shield – in whatever form it takes), I can’t give a price for that until I’ve figured it out.  I’ll be publishing plans and build instructions in due course, but if there’s any fancy bits that aren’t trivial to put together (PCBs or something), I’ll keep some to one side for those of you who have expressed an interest.

Regular polargraphs too?!

Yes, I’ve got parts to make up a bunch of regular polargraph kits too.  These don’t need any further development, so will be ready to ship in about two weeks from order date.  And parts kits.

Sandy, you are slower than a donkey, hey!

I want to do it properly since this is a fair bit more involved than previous rounds, and I owe it to you all to be professional about it – and if that means taking a little more time to make sure it’s as good as it can be, then so be it.  I’d prefer that than to deliver a bunch of sub-standard collections of parts. If it looks like it’s going to take very much longer, then I’ll be in touch, and of course you can get your money back then if you don’t want to wait.

Polargraph SD plus hoofer doofer.

I’m working on this Polargraph SD machine (basically the prototype for Polargraph SDs to come) for an artist who won’t be able to run “tethered”, so it was necessary to make a little doofer to control the machine.  It works!

This is just two buttons, and three little LEDs on a bit of stripboard, with a little 3D printed case.  The button signals and the LED sources are on pins A1, A2, A3, A4 and A5.  First click engages the motors and sets the position to preset value (i.e. the home point), and then you use the other button to select the command source to use, choosing between USB and SD card.  Then once that’s changed to SD card, and the start button pressed again, then it immediately starts reading its commands from a preset file on the card.

Polargraph SD with remote

This is a little crude at the moment, and I think the code should be more-or-less rewritten to allow things like pausing and cancel / reset, but it’ll do the job. I don’t think a remote like this will be part of the standard Polargraph SD kit, but a couple of buttons might sneak in.

Polargraph SD with remote

I’m thinking of the custom board being something like an add-on shield for a Mega / Sanguino, with motor drivers and an SD card reader built-in, but with passthrough headers to allow an offset shield to be added without getting in the way, and using an off-the-shelf LCD+buttons shield for hardware control.  Basically a mega motorshield.  I can’t really decide between a L293D/SN754410 (a la adafruit) setup or a A3988 (eggbot/pololu/stepstick) based design.  Any feelings either way?


Two great builds

Morbo posted in the forum with a link to some great pics of his drawbot build.  I especially like the name “politzler” – which is maybe a kind of polite scrawler, or maybe a police scrawler, I can’t decide.

(I would insert a pic but they’re all rights reserved – just go and look at Morbo’s flickr set covering the build – cracking stuff, and see the delta bot pics too.  Dead jel.)

Secondly, just saw this one today – very impressive build from Dealywhopper based on a old board trolley thingy – what a perfect adaptation!  Brilliant write-up and so true: “Operating it is really more of a zen exercise, sort of like watching a plant grow.”

I admit though, my favourite part is on this other project that is written-up on Dealywhopper’s site: This monstrous stand for a dishwasher.  I laughed out loud, that last, terrifyingly familiar line:

“It’s certainly not the most practical piece of furniture we have.  Actually, it’s downright ridiculous, but I like it, and we’re sure as hell not getting rid of it, because it was a bastard to make.”

And the picture where the item is in situ, utterly dwarfing everything else around it is just gold.  Go and read it and encourage the building of more dealywhoppers.

ITead motorshield in the wild

Active forum member Woodpecker went looking for alternatives to the Adafruit motorshield, and came across this dual-stepper shield made by ITead Studios, and sold by Komputer.de in Germany. I got a couple, and they are very reasonably priced. These are pre-assembled, based on the A3967 driver chip – the same ones that Brian Schmalz uses in the EasyDriver boards.  They can drive upto 750mA per motor, which is a bit more than the L293Ds in the Adafruit design (though that can be upgraded with SN754410 drivers for those that are as infatuated with adafruit as I am).

Datasheet

Schematic

The main feature of this shield is that the A3967s are serial steppers, which means they use fewer pins, and the shield happens to use pins 2 through 9 on the arduino.  Which means that the magic pins 10, 11, 12 and 13 are free – and these are the pins that the SPI interface appears on in the Uno-sized boards.  That opens up the possibilities of using a pre-assembled SD card reader with the Uno, which is interesting.  Now I’d more-or-less given up on running an SD card with an Uno, because of the double-whammy of needing to rewire and because of the memory limitations.

HOWEVER, if this board removes one of those impediments, then the game is perhaps afoot again.  I can conceive of a firmware that is very minimal – just responds to vector graphic commands only, and is optimised for standalone drawing.  Is this worth having?  I suppose I can’t know until I try it eh.

The other feature of the shield, is that all the spare analog pins are broken out to three-pin headers, and the motor connections themselves are exposed as four-pin headers AND screw terminals.  So this could be used without the faintly comical terminal adapters that I’ve been making up so far.

The downside: There doesn’t seem to be a way to turn these off.  The EasyDriver breaks all pins out so motors can be enabled / sleeped, but this shield appears not to.  This is a bit of a blow, because it means the drivers and motors are energised as soon as the board has power applied, and it can’t be turned off programmatically.

The A3967 chip is also less tolerant of bad behaviour like unplugging the motors while it’s on – this is much more likely to damage the ICs than with the L293Ds, so be careful.

Oh and one other thing – these are HOT!  Makes the whole arduino hot.  I believe the IC will always be hot, and probably well within threshold, but I think heatsinks will be the order of the day again.

Anyway, I have released a new firmware that is built for the ITead shield.  It is otherwise identical to the regular firmware, but dispenses with the AFMotor library. The servo pen lift is now also controlled from pin A0 (aka d14), which is the first three-pin header in the block on the motorshield.  You can see that on the picture.

The controversial RJ45 power connectors and some big wheels

How futuristic does this look.

Well ok, maybe not futuristic.  But this is a new counterweight replacement, it uses spring-loaded take-up spools from a retractable washing line.  These have power springs in them (like metal tape measures).

The second new thing is using RJ45 network cables as motor power leads.  This is basically a way of getting cheap extension leads I don’t have to make up myself.  Making up the cables was the really onerous bit about kitting, so this is the solution to that, as well as probably being more reliable.

Polargraph motor connectors

The connections are very neat, and the cables are very affordable, and the extra conductors means that it’ll be quite easy to piggy-back endstop detectors on the same cable.

Polargraph motorshield connectors

I’ve used the little sparkfun breakouts with 90 degree pin headers to connect into the screw terminals on the motorshield.  The network cables are a lot stiffer than the old ones, so I’m a bit worried about the strength of the connections, but I’m pretty pleased with it.

Now, shepherds pie and carrots for dinner – rock on.