The settings on this page are for firmware version 0.96. If you have an earlier version see here. You can find out the firmware version by entering $fv or by looking at the console output when you hit reset.
This page describes how configuration works in text mode from the Command Line. All configs on this page are also accessible in JSON mode. Well almost. Those few commands that apply to only one mode or the other are noted.
Summary / Cheat Sheet
Connect to the Controller Board USB at 115,200 baud. To see a value enter $cmd. To set a value enter $cmd=value. Most commands are self explanatory. See the sections following the cheat sheet for those that require further explanation.
Motor Groups
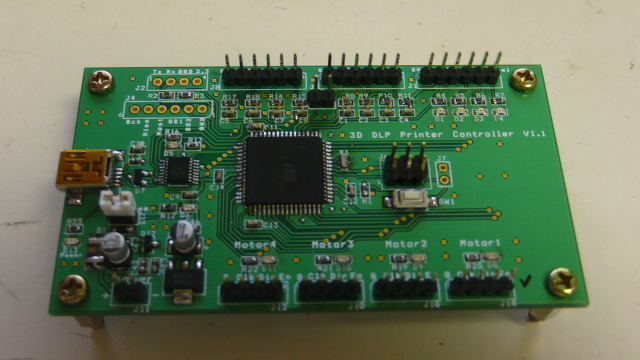
Settings specific to a given motor. There are 4 motor groups, numbered 1,2,3,4 as labeled on the Controller board.
| Setting |
Description |
Notes |
| $1ma |
Motor mapping to axis |
Typically: $1ma=0, $2ma=1, $3ma=2, $4ma=3 to map motors 1-4 to X,Y,Z,A, respectively |
| $1sa |
Step angle |
Typical setting is $1s1=1.8 for 1.8 degrees per step (200 steps per revolution) |
| $1tr |
Travel per revolution |
How far the mapped axis moves per motor revolution. E.g 2.54mm for a 10 TPI screw axis |
| $1mi |
Microsteps |
Controller Board uses 1,2,4 and 8. Other values are accepted but warned |
| $1po |
Polarity |
0=clockwise rotation, 1=counterclockwise - although these are dependent on your motor wiring. |
| $1pm |
Power management mode |
0=axis remains powered when idle, 1=power shuts off when axis is not moving |
Axis Groups
Settings specific to a given axis. There are 6 axis groups, one for each of X,Y,Z,A,B,C. Not all axes have all parameters.
| Setting |
Description |
Notes |
| $xam |
Axis mode |
See details for setting. Normally this is =1 "normal" |
| $xvm |
Velocity maximum |
Max velocity for axis, aka "traverse rate" or "seek" |
| $xfr |
Feed rate maximum |
Sets maximum feed rate for that axis. Does NOT set the F word |
| $xtm |
Travel maximum |
Used by homing to know when to give up |
| $xjm |
Jerk maximum |
main parameter for acceleration management (Note: takes the place of a max acceleration value) |
| $xjh |
Jerk homing |
jerk used during homing operations. On axes XYZA only |
| $xjd |
Junction deviation |
For cornering control |
| $ara |
Radius setting |
Rotational axes only (ABC only) |
| $xsn |
Minimum switch mode |
0=disabled, 1=homing-only, 2=limit-only, 3=homing-and-limit (XYZA only) |
| $xsx |
Maximum switch mode |
0=disabled, 1=homing-only, 2=limit-only, 3=homing-and-limit (XYZA only) |
| $xsv |
Search velocity |
Homing speed during search phase (drive to switch) (XYZA only) |
| $xlv |
Latch velocity |
Homing speed during latch phase (drive off switch) (XYZA only) |
| $xzb |
Zero backoff |
offset from switch for zero in absolute coordinate system (XYZA only) |
PWM Group (Pulse Width Modulation)
There is currently only one PWM channel (p1), but the configs are structured for multiple PWM groups. The PWM channel is set up to act as a remote control Electronic Speed Controller (ESC), but can be used for other PWM functions using these settings.
| Setting |
Description |
Notes |
| $p1frq |
Frequency |
in Hz, e.g. 100 |
| $p1csl |
Clockwise speed low |
In RPM - arbitrary units unless you calibrate it, e.g. 1000 |
| $p1csh |
Clockwise speed high |
In RPM |
| $p1cpl |
Clockwise phase low |
0 to 1, e.g. 0.125 for 12.5% phase angle |
| $p1cph |
Clockwise phase high |
0 to 1 |
| $p1wsl |
Counter clockwise speed low |
In RPM |
| $p1wsh |
Counter clockwise speed high |
In RPM |
| $p1wpl |
Counter clockwise phase low |
0 to 1 |
| $p1wph |
Counter clockwise phase high |
0 to 1 |
| $p1pof |
Phase off |
0 to 1 |
System Group
The system group contains the following global machine and communication settings. The system group can be listed by requesting$sys or {"sys":""} in JSON mode
Identification Settings These are reported on the startup strings and should be included in any support discussions.
| Setting |
Description |
Notes |
| $fb |
Firmware build |
Read-only value, e.g. 380.05 |
| $fv |
Firmware version |
Read-only value, e.g. 0.96 |
| $hv |
Hardware version |
Read-write value, set this to to 6 for v6 and earlier boards, 8 for v7 and later boards. Defaults to 8 |
| $id |
Unique ID |
Each board has a read-only unique ID |
Global System Settings
| Setting |
Description |
Notes |
| $ja |
Junction acceleration |
Global cornering acceleration value |
| $ct |
Chordal tolerance |
Sets precision of arc drawing. Trades off precision for max arc draw rate |
| $st |
Switch type |
0=NO, 1=NC |
| $mt |
Motor disable timeout |
Number of seconds before motor power is automatically released. Maximum value is 40 million. |
Communications Settings Set communications speeds and modes.
| Setting |
Description |
Notes |
| $ej |
Enable JSON mode |
0=text mode, 1=JSON mode |
| $jv |
JSON verbosity |
0=silent ... 5=verbose (see details) |
| $tv |
Text mode verbosity |
0=silent, 1=verbose |
| $qv |
Queue report verbosity |
0=off, 1=filtered, 2=verbose |
| $sv |
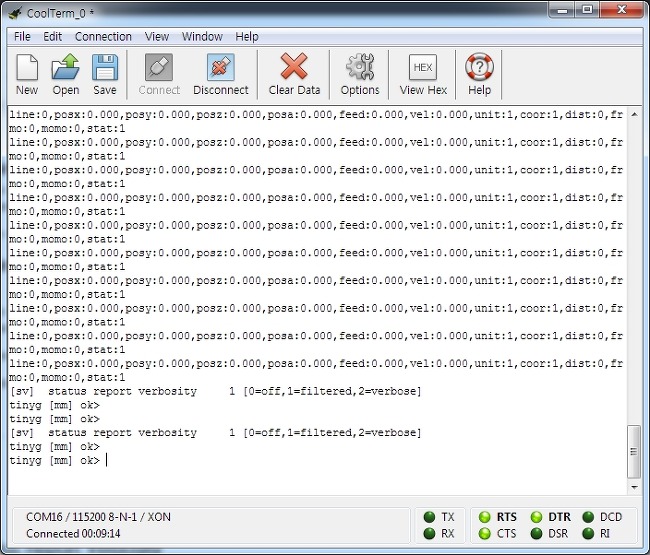
Status report verbosity |
0=off, 1=filtered, 2=verbose |
| $si |
Status report interval |
in milliseconds (50 ms minimum interval) |
| $ic |
Ignore CR / LF on RX |
0=accept CR or LF as line terminator, 1=ignore CRs, 2=ignore LFs |
| $ec |
Enable CR on TX |
0=send LF line termination on TX, 1= send both LF and CR termination |
| $ee |
Enable character echo |
0=off, 1=enabled |
| $ex |
Enable flow control |
0=off, 1=XON/XOFF enabled, 2=RTS/CTS enabled |
| $baud |
Baud rate |
1=9600, 2=19200, 3=38400, 4=57600, 5=115200, 6=230400 -- 115200 is default |
Gcode Initialization Defaults Gcode settings loaded on power up, abort/reset and Program End (M2 or M30). Changing these does NOT change the current Gcode mode, only the initialization settings.
| Setting |
Description |
Notes |
| $gpl |
Default plane selection |
0=XY plane (G17), 1=XZ plane (G18), 2=YZ plane (G19) |
| $gun |
Default units mode |
0=inches mode (G20), 1=mm mode (G21) |
| $gco |
Default coordinate system |
1=G54, 2=G55, 3=G56, 4=G57, 5=G58, 6=G59 |
| $gpa |
Default path control mode |
0=Exact path mode (G61), 1=Exact stop mode (G61.1), 2=Continuous mode (G64) |
| $gdi |
Default distance mode |
0=Absolute mode (G90), 1=Incremental mode (G91) |
Commands and Reports
These $configs invoke reports and functions
| Command |
Description |
Notes |
| $sr |
Request status report |
SR also sets status report format in JSON mode |
| $qr |
Request queue report |
|
| $qf |
Flush planner queue |
Used with '!' feedhold for jogging, probes and other sequences. Usage: {"qf":1} |
| $md |
Disable motors |
Unpower all motors |
| $me |
Energize motors |
Energize all motors with power management mode set to 0 (e.g. $1pm=0) |
| $test |
Invoke self tests |
$test=n for test number; $test returns help screen in text mode |
| $defa |
Reset to factory defaults |
$defa=1 to reset |
| $boot |
Enter boot loader |
$boot=1 enters boot loader |
| $help |
Show help screen |
Show system help screen; $h also works |
Note: Status report parameters is settable in JSON only - see JSON mode for details
Hidden System Settings
The following settings are accessible but do not appear in the system group listings. This is because they really should not be messed with.
| Setting |
Description |
Notes |
| $ml |
Minimum line length |
|
| $ma |
Arc segment length |
|
| $ms |
Segment timing |
|
| $qrh |
Queue report hi water mark |
set between 0 and 24; default is 20 |
| $qrl |
Queue report low water mark |
set between 0 and 24; default is 2 |
Settings Details
Settings are case insensitive - they are shown in upper case for emphasis only. The leading '1' can be any motor, 1-4, and the leading 'x' can be any axis (with some restrictions as noted).
Motor Settings
$1MA - MAp motor to axis
Axes must be input as numbers, with X=0, Y=1, Z=2, A=3, B=4 and C=5. As you might expect, mapping motor 1 to X will cause X movement to drive motor 1. The example below is a way to run a dual-Y gantry such as a 4 motor Shapeoko setup. Movement in Y will drive both motor2 and motor4.
 $1ma=0     Maps motor 1 to the X axis
 $2ma=1     Maps motor 2 to the Y axis
 $3ma=2     Maps motor 3 to the Z axis
 $4ma=1     Maps motor 4 to the Y axis
$1SA - Step Angle for the motor
This is a decimal number which is often 1.8 degrees per step, but should reflect the motor in use. You might also find 0.9, 3.6, 7.5 or other values. You can usually read this off the motor label. If a motor is indicated in steps per revolution just divide 360 by that number. A 200 step-per-rev motor is 1.8 degrees, a 400 step-per-rev motor has 0.9 degrees per step.
$1sa=1.8 This is a typical value for many motors
$1TR - Travel per Revolution
TR needs to be set to the distance the mapped axis will move for one revolution of the motor. - e.g. if motor 1 is mapped to the X axis, then $1tr applies to the Xaxis. If the machine is in mm mode (G21) the TR value for XYZ axes should be entered in mm. If in inches mode (G20) XYZ should be entered in inches. ABC axes are always entered in degrees. See examples below.
For XYZ the travel-per-revolution value is usually the result of the lead screw pitch or pulley circumference.
- A 10 thread-per-inch (TPI) leadscrew moves 0.100" per revolution. TR in inches would be 0.100, or 2.54 in mm mode.
- A 0.500" diameter pulley will travel 3.14159" per revolution, absent any other gearing. A typical value for a Shapeoko or Reprap belt driven machine is on the order of 36.540 mm per revolution. Don't take this as exact - you will need to do your own calibration on your machine to get this setting exact.
For ABC the travel-per-revolution value is entered in degrees. This value will be 360 degrees for an axis that is not geared down - one revolution = 360 degrees. The value for a geared rotary axis is 360 divided by the gear ratio. For example, a motor-driven rotary table with 4 degrees of table movement per handle rotation has a gear ratio of 90:1. The Travel per Revolution value should be set to 4.
Note that the travel-per-revolution is independent of the radius setting in the rotary axis settings. Set TR first to reflect the gearing, then set any Radius values if that is needed.
Note that Travel per Revolution is a motor parameter, not an axis parameter as one might think. Consider the case of a dual Y gantry with lead screws of different pitch (how weird). The travel per revolution would be different for each motor.
$1tr=2.54 Sets motor 1 to a 10 TPI travel from millimeters (2.54 mm per revolution)
$1MI - MIcrosteps
Controller Board microsteps are set in firmware, not as hardware jumpers as on some other systems. The following microstep values are supported:
- 1 = no microsteps (whole steps)
- 2 = half stepping
- 4 = quarter stepping
- 8 = eighth stepping
It is a misconception that higher microstep values are better - beyond a certain point they are a detriment to performance. In a typical setup the total power delivered to the motor (and hence torque) will go down as you increase the microsteps, especially at higher speeds. Also, using microsteps to set the finest machine resolution is source of error as the shaft angle isn't necessarily going to be at the theoretical point. Don't just assume that 1/8 microstepping is the right setting for your application. Try out different settings to balance smoothness and power.
$3mi=8 Set 1/8 microsteps for motor 3
Note: Values other than 1,2,4 and 8 are accepted. This is to support some people that have crazily wired Controller Board to other drivers like these crazy 1.3 Kw servos Saci's wired up and like some of the common commercial stepper driver running 10x or 16x steps. If you are using the drivers on Controller Board this will cause them to malfunction, so please don't do this unless you are one of those hacker types that soldered up your Controller Board .
$1PO - POlarity
Set to one of the following:
- 0 = Normal motor polarity
- 1 = Invert motor polarity
Polarity sets which direction the motor will turn when presented with positive and negative Gcode coordinates. It's affected by how you wired the motors and by mechanical factors. Set polarity so the indicated axis travels in the correct orientation for your machine.
Travel in X and Y is dependent on the conventions for your particular machine and CAD setup. Typically X is left/right movement, and Y is towards and away from you, but people often set up the machine to agree with the visualization their CAD program provides, and can depend on where you stand when operating the machine. Typically X+ moves to the right, X- to the left, Y+ away from you, and Y- towards you. Z is by convention the cutting axis, which is the vertical axis on a typical milling machine. Z+ should move up, and Z- should move down, into the work.
$3po=0 Set polarity to normal
$1PM - Power Management mode
Set to one of the following:
- 0 = Leave motor powered on when stopped
- 1 = Turn motor power off when stopped
Stepper motors actually consume maximum power when idle. They hold torque and get hot. If you shut off power the motor has (almost) no holding torque. Some machine configurations are OK if you shut off the power on idle (like most leadscrew machines), others are not (some belt/pulley configs and some non-cartesian robots)
$4pm=1 Set low-power idle for motor 4
New behaviors as of build 378.04 and later
Power management now operates as follows. Setting $1pm=0 sets "powered" mode (as before), but it works differently:
- A motor set to $1pm=0 will become powered and will remain powered for N seconds specified in the $mt variable (e.g. 60 seconds, which would be {"mt":60} ). The elapsed time is measured from the last "event', such as the end of the move, or from when the enable was turned on.
- Power mode changes take effect immediately - for changed to '0' or to '1'
- All '0' motors are powered on startup and from reset
- All '0' motors can be enabled by issuing a $me command ( also {"me":""} )
- All motors are disabled by issuing a $md command ( also {"md":""} )
Axis Settings
$xAM - Axis Mode
Sets the function of the axis.
- 0 = Disable. All input to that axis will be ignored and the axis will not move.
- 1 = Standard. Linear axes move in length units. Rotary axes move in degrees.
- 2 = Inhibited. Axis values are taken into account when planning moves, but the axis will not move. Use this to perform a Z kill or to do a compute-only run.
- 3 = Radius mode. (Rotary axes only) In radius mode gcode values are interpreted as linear units; either inches or mm depending on the prevailing G20/G21 setting. The conversion of linear units to degrees is accomplished using the radius setting for that axis. See $aRA for details.
$zam=2 Inhibit the Z axis; $zam1 will restore standard operation
$xVM - Velocity Maximum
(aka traverse rate or seek rate). Sets the maximum velocity the axis will move during a G0 move (traverse). This is set in length units per minute for linear axes, degrees per minute for rotary axes.
Note that the max velocity is per-axis. Diagonal / multi-axis traverses will actually occur at the fastest speed the combined set of axes and the geometry will allow, and may be faster than the individual axis max velocities. For example, max velocity for X and Y are set to 1000 mm/min. For a 45 degree traverse in X and Y the toolhead would travel at 1414.21 mm/min.
$xvm=1200        sets X maximum velocity (G0) to 1200 mm/min - assuming G21 is active (i.e. the machine is in MM mode)
$zvm=30.0        sets Z to 30 inches per minute - assuming G20 is active (i.e. inches mode)
$avm=36000       sets A to 100 revolutions per minute (360 * 100)
$xFR - Feed Rate maximum
Sets the maximum velocity the axis will move during a feed in a G1, G2, or G3 move. This works similarly to maximum velocity, but instead of actually setting the speed, it only serves to establish a "do not exceed" for Gcode F words. Put another way, the maximum feed rate setting is NOT used to set the Gcode's F value; it is only a maximum that may be used to limit the F value provided in a gcode file.
Axis feed rates should be equal to or less than the maximum velocity. See Controller Board Tuning for more details.
$xfr=1000 sets X max feed rate to 1000 mm/min - assuming G21 is active (i.e. the machine is in MM mode)
$xTM - Travel Maximum
Defines the maximum extent of travel in that axis. This is used during homing. See Homing for more details on how this is used.
$xJM - Jerk Maximum
Sets the maximum jerk value for that axis. Jerk is settable independently for each axis to support machines with different dynamics per axis - such as Shapeoko with belts for X and Y, screws for Z, Probotix with 5 pitch X and Y screws and 12 pitch Z screws, and any machine with both linear and rotary axes.
Jerk is in units per minutes^3, so the numbers are quite large. Some common values are shown in millimeters in the examples below
$xjm=50,000,000          Set X jerk to 50 million MM per min^3. This is a good value for a moderate speed machine
$zjm=25,000,000          A reasonable setting for a slower Z axis
$xjm=5,000,000,000       X jerk for Shapeoko. Yes, that's 5 billion
The jerk term in mm is measured in mm/min^3. In inches mode it's units are inches/min^3. So the conversion from mm to inches is 1/(25.4). The same values as above are shown in inches are:
50,000,000 mm/min^3      is 1,968,504 in/min^3 2,000,000 would suffice
25,000,000 mm/min^3      is 984,251 in/min^3 1,000,000 would suffice
5,000,000,000 mm/min^3   is 196,850,400 in/min^3 200,000,000 would suffice
$xJH - Jerk Homing
Sets the jerk value used for homing to stop movement when switches are hit or released. In most cases the same value as $xJM is OK. However, if your $xJM is very low you may need a higher value for homing in order to prevent damage to the switches.
$xJD - Junction Deviation
This one is somewhat complicated. Junction deviation - in combination with Junction Acceleration ($JA) from the system group - sets the velocity reduction used during cornering through the junction of two lines. The reduction is based on controlling the centripetal acceleration through the junction to the value set in JA with the junction deviation being the "tightness" of the controlling cornering circle. An explanation of what's happening here can be found on Sonny Jeon's blog: Improving grbl cornering algorithm.
It's important to realize that the tool head does not actually follow the controlling circle - the circle is just used to set the speed of the tool through the defined path. In other words, the tool does go through the sharp corner, just not as fast. This is a Gcode G61 - Exact Path Mode operation, not a Gcode G64 - Continuous Path Mode (aka corner rounding, or splining) operation.
While JA is set globally and applies to all axes, JD is set per axis and can vary depending on the characteristics of the axis. An axis that moves more slowly should have a JD that is less than an axis that can move more quickly, as the larger the JD the faster the machine will move through the junction (i.e. a bigger controlling circle). The following example has some representative values for a Probotix Fireball V90 machine. The V90 has 5 TPI X and Y screws, and 12 TPI Z. All values in MM.
 $xJD 0.05     Units are mm
 $yJD 0.05
 $zJD 0.02     Setting Z to a smaller value means that moves with a change in the Z component will move proportionately slower depending on the contribution in Z.
 $JA 200,000   Units are mm/min^2. As before, commas are ignored and are provided only for clarity
$aRA - Radius value
The radius value is used by rotational axes only (A, B and C) to convert linear units to degrees when in radius mode.
For example; if the A radius is set to 10 mm it means that a value of 6.28318531 mm will make the A axis travel one full revolution - as 62.383... is the circumference of the circle of radius R ( 2*PI*R, or 10 * 2 * 3.14159...) (Assuming $nTR = 360 -- see note below). Receiving the gcode block "G0 A62.83" will turn the A axis one full revolution (360 degrees) from a starting position of 0. All internal computations and settings are still in degrees - it's just that gcode units received for the axis are converted to degrees using the specified radius.
Note that the Travel per Revolution value ($1TR) is used but unaffected in radius mode. The degrees per revolution still applies, it's just that the degrees were computed based on the radius and the Gcode axis values. See Travel per Revolution (See $1TR) in the motor group.
Homing Settings
Please see Controller Board Homing for details and more help on homing settings:
- $xSN - Minimum switch mode
- $xSX - Maximum switch mode
- $xSV - Homing Search Velocity
- $xLV - Homing Latch Velocity
- $xLB - Homing Latch Backoff
- $xZB - Homing Zero Backoff
By way of example, my Shapeoko is set up this way:
| Setting |
Description |
Example |
| $ST |
Switch Type |
1=NC |
| $XJH |
X Homing Jerk |
10000000000 (10 billion) |
| $XSN |
X Minimum Switch Mode |
3=limit-and-homing |
| $XSX |
X Maximum Switch Mode |
2=limit-only |
| $XTM |
X Travel Maximum |
180 mm |
| $XSV |
X Homing Search Velocity |
3000 mm/min |
| $XLV |
X Homing Latch Velocity |
100 mm/min |
| $XLB |
X Homing Latch Backoff |
20 mm |
| $XZB |
X Homing Zero Backoff |
3 mm |
|
|
|
| $YJH |
Y Homing Jerk |
10000000000 (10 billion) |
| $YSN |
Y Minimum Switch Mode |
3=limit-and-homing |
| $YSX |
Y Maximum Switch Mode |
2=limit-only |
| $YTM |
Y Travel Maximum |
180 mm |
| $YSV |
Y Homing Search Velocity |
3000 mm/min |
| $YLV |
Y Homing Latch Velocity |
100 mm/min |
| $YLB |
Y Homing Latch Backoff |
20 mm |
| $YZB |
Y Homing Zero Backoff |
3 mm |
|
|
|
| $ZJH |
X Homing Jerk |
100000000 (100 million) |
| $ZSN |
Z Minimum Switch Mode |
0=disabled (with NC switches it's important all unused switches are disabled) |
| $ZSX |
Z Maximum Switch Mode |
3=limit-and-homing |
| $ZTM |
Z Travel Maximum |
100 mm |
| $ZSV |
Z Homing Search Velocity |
1000 mm/min |
| $ZLV |
Z Homing Latch Velocity |
100 mm/min |
| $ZLB |
Z Homing Latch Backoff |
10 mm |
| $ZZB |
Z Homing Zero Backoff |
5 mm |
|
|
|
| $ASN |
A Minimum Switch Mode |
0=disabled |
| $ASX |
A Maximum Switch Mode |
0=disabled |
System Group Settings
These are general system-wide parameters and are part of the "sys" group.
Identification Settings
$FB - Firmware Build number
Read-only value. Can be queried. Currently this is something above 370.02.
$FV - Firmware Version
Read-only value. Can be queried.
$HV - Hardware Version
Read-write value. Set to 6 for version 6 or earlier board, Set to 7 for version 7 board. Used to configure switch and output ports which are somewhat different between revs. This is set to v7 by default.
$ID - Unique Board Identifier
Read-only value. Can be queried.
Global System Settings
$JA - Junction Acceleration
In conjunction with the global $jd setting sets the cornering speed. See $jd for explanation
$ja=50000   - 50,000 mm/min^2 - a reasonable value for a modest performance machine
$ja=200000  - 200,000 mm/min^2 - a reasonable value for a higher performance machine
$CT - Chordal Tolerance
Arcs are generated as sets of very short straight lines that approximate a curve. Each line is a "chord" that spans the endpoints of that segment of the arc. Chordal tolerance sets the maximum allowable deviation between the true arc and straight line that approximates it - which will be in the middle of the line / arc.
Setting chordal tolerance high will make curves "rougher", but they can execute faster. Setting them smaller will make for smoother arcs that may take longer to execute. The lower-limit of $ct is set by the minimum arc segment length, which really should not be changed (See hidden parameters).
Sonny Jeon of the grbl project pointed this one out.
$ST - Switch Type
Sets the type of switch used for homing and/or limits. All switches must be of the same type (mixes are not supported).
$st=0   - Normally Open switches (NO)
$st=1   - Normally Closed switches (NC)
$MT - Motor Power Timeout
Sets the number of seconds motors will remain powered after the last 'event'. E.g. set to 60 to keep motors powered for 1 minute after a move completes. Only applies to motors with power menagement set to 0 - e.g. $1pm=0. (build 378.04 and later)
$mt=60       - Keep motors energized for 60 seconds after last movement command
$mt=1000000  - Keep motors energized for 1 million seconds after last movement command (11.57 days)
Communications Settings
$EJ - Enable JSON Mode on Power Up
This sets the startup mode. JSON mode can be invoked at any time by sending a line starting with an open curly '{'. JSON mode is exited any time by sending a line starting with '$', '?' or 'h'
Please note: The two startup lines on reset will always be in JSON format regardless of setting in order to allow UIs to sync with an unknown board.
$ej=0      - Disable JSON mode on power-up and reset (e - Set Baud Ratenables text mode)
$ej=1      - Enable JSON mode on power-up and reset
$JV - Set JSON verbosity
If you are using JSON mode with high-speed files (many short lines at high feed rates) you probably want setting 3 or 4. You may also want to change the baud rate to 230400.
$jv=0      - Silent   - No response is provided for any command
$jv=1      - Footer   - Returns footer only - no command echo, gcode blocks or messages
$jv=2      - Messages - Returns footers, exception messages and gcode comment messages
$jv=3      - Configs  - Returns footer, messages, config command body
$jv=4      - Linenum  - Returns footer, messages, config command body, and gcode line numbers if present
$jv=5      - Verbose  - Returns footer, messages, config command body, and gcode blocks
$TV - Set Text mode verbosity
We recommend using Verbose, except for very special cases.
$tv=0      - Silent - no response is provided
$tv=1      - Verbose - returns OK and error responses
$QV - Queue Report Verbosity
Queue reports return the number of available buffers in the planner queue. The planner queue has 24 buffers and therefore can have as many as 24 Gcode blocks queued for execution. An empty queue will report 24 available buffers. A full one will report 0.
Using the planner queue depth as a way to manage flow control when sending a Gcode file is actually a much better way than managing the serial input buffer. If you keep the planner full to about 2 blocks available it will run really smoothly. You also want to make sure the queue doesn't starve, say - more than 20 blocks available.
Verbosity settings are:
$qv=0      - Silent   - queue reports are off
$qv=1      - Filtered - returns reports when depth changes and is above hi water mark or below low water mark
$qv=2      - Verbose  - returns queue reports for every block queued to the planner buffer
You can also get a manual queue report by sending $qr
$QVH - Queue Report High Water Mark
Set high-water mark for reporting. Set to 20 by default. This is a hidden setting and will not show up in $sys listings.
$QVL - Queue Report Low Water Mark
Set low-water mark for reporting. Set to 2 by default. This is a hidden setting and will not show up in $sys listings.
$SV - Status Report Verbosity
Please see Status Reports for a discussion of $sv and $si status report settings.
$sv=0      - Silent   - status reports are off
$sv=1      - Filtered - returns only changed values in status reports
$sv=2      - Verbose  - returns all values in status reports
$SI - Status Interval
The minimum is 50 ms. Trying to set a value below the minimum will set the minimum value.
$si=100 - Status interval in milliseconds
$IC - Ignore CR or LF on RX
$ic=0      - Don't ignore CR or LF in received data
$ic=1      - Ignore CR in received data
$ic=2      - Ignore LF in received data
$EC - Expand LF to CRLF on TX data
$ec=0      - off
$ec=1      - on
$EE - Enable Character Echo
This should be disabled for JSON mode. In text mode it's optional either way.
$ee=0      - Disable character echo
$ee=1      - Enable character echo
$EX - Enable Flow Control
$ex=0      - Disable flow control
$ex=1      - Enable XON/XOFF flow control protocol
$ex=2      - Enable RTS/CTS flow control protocol
$BAUD - Set USB Baud Rate
The default baud rate for the USB port is 115,200 baud. The following additional baud rates may be set. The sequence for changing the baud rate is: (1) Issue the $baud command, (2) wait for a response verifying the command, (3) change to the new baud rate.
$baud=0     - Illegal baud rate setting. Returns an error
$baud=1     - 9600
$baud=2     - 19200
$baud=3     - 38400
$baud=4     - 57600
$baud=5     - 115200
$baud=6     - 230400
Gcode Default Parameters
These parameters set the values for the Gcode model on power-up or reset. They do not affect the current gcode dynamic model. For example, entering $gun=0 will not change the system to inches mode, but it will cause it to initialize in inches mode during reset or power-up.
These are also part of the "sys" group.
$GPL - Gcode Default Plane Selection
$gpl=0      - G17 (XY plane)
$gpl=1      - G18 (XZ plane)
$gpl=2      - G19 (YZ plane)
$GUN - Gcode Default Units
$gun=0      - G20 (inches)
$gun=1      - G21 (millimeters)
$GCO - Gcode Default Coordinate System
$gco=1      - G54 (coordinate system 1)
$gco=2      - G55 (coordinate system 2)
$gco=3      - G56 (coordinate system 3)
$gco=4      - G57 (coordinate system 4)
$gco=5      - G58 (coordinate system 5)
$gco=6      - G59 (coordinate system 6)
$GPA - Gcode Default Path Control
$gpa=0      - G61 (exact stop mode)
$gpa=1      - G61.1 (exact path mode)
$gpa=2      - G64 (continuous mode)
$GDI - Gcode Distance Mode
$gdi=0      - G90 (absolute mode)
$gdi=1      - G91 (incremental mode)
Coordinate System and Origin Offsets
$g54x - $g59c
Coordinate system offsets are the values used by G54, G55, G56, G57, G58 and G59 commands to define the offsets from the machine (absolute) coordinate system for X,Y,Z,A,B and C. G54-G59 correspond to the Gcode coordinate systems 1-6, respectively.
By convention G54 is set to no offsets (all zeroes) so it is the same as the machine's absolute coordinate system. This is true because the G53 command "move in absolute coordinates" is only in effect for the current Gcode block. After that the dynamic model reverts to the coordinate system previously in effect. So if you want to say in absolute coordinates you need a persistent machine coordinate system, by convention G54.
Another convention is to set G55 to your common coordinate system, we set this to be 0,0 in the middle of the table. So once you have zeroed issuing g55 g28 will set to this system and position the head in the middle of the table. (Note: this can be done on one line of gcode - it does not need to be 2 separate commands).
G54-G59 offsets can be set per the following example:
$g54x=0         Set G54 to be the same as the machine coordinate system
$g54y=0
$g54z=0
$g54a=0
$g54b=0
$g54c=0

$g55x=90.0      Set G55 to be in the middle of the table
$g55y=90.0
$g55z=0
$g55a=0
$g55b=0
$g55c=0
In JSON mode you can set a coordiante system in a single command. Only those axes specified are changed.
{"g55"":{"x":90,"y":90,"z":"0"}}
Displaying Offsets
Offsets can be displayed individually
$g54x - returns a single value
...or as a group: $g54 - returns all 6 values in the G54 group $g92 - returns all 6 values of the origin offset group
...or all together: $o - returns all offsets in the system (not available in JSON)
Note: the G54-G59 settings are persistent settings that are preserved between resets (i.e. in EEPROM), unlike the G92 origin offset settings which are just in the volatile Gcode model and are thus not preserved.
G10 Operation
Gcode provides the G10 L2 command to perform this same function. Coordinate offsets can be set from Gcode using the G10 command, e.g. G10 P2 L2 X20.000 - the P word is the coordinate system numbered 1-6, the L word =2 is according to standard, but is ignored by Controller Board (for now)
Controller Board does not persist G10 settings, however. This is not in accordance with the Gcode spec. Any G10 settings that are provided will be used until reset, power cycle, or they are overwritten by a $g5xx command or another G10 command.
Commands
These commands cause various actions, and are not technically "settings".
$SR - Status Report
Returns a status report or set the contents of a status report (JSON only). Identical to ? command. See Status Reports for details.
$QR - Queue Report
Manually request a queue report. See $QV for details.
$QF - Queue Flush
Removes all Gcode blocks remaining in the planner queue. This is useful to clear the buffer after a feedhold to create homing, jogging, probes and other cycles.
$MD - Disable Motors
Unpower all motors
$ME - Energize Motors
Power all motors that have power management mode set to zero (e.g. $1pm=0)
$TEST - Run Self Test
Execute $test to get a listing of available tests. Run $test=N, where N is the test number.
$DEFA - Reset default profile settings
Controller Board comes with a set of defaults pre-programmed to a specific machine profile. The default profile is set for a relatively slow screw machine such as the Zen Toolworks 7x12. Other default profles are settable at compile time by including the right .h file. If you are having trouble with your settings and want to revert to the default settings enter: $defa=1 This will revert all settings to defaults. Do a screencap of the $$ dump if you want to refer back to the current settings
Hidden Parameters
These parameters are not part of any group and generally should not be changed. Serious malfunction can occur if these are not set correctly
$ML- Minimum Line Segment
Don't change this unless you are seriously tweaking Controller Board for your application. It can cause many things to break. This value does not appear in system group listings ($sys)
$ml=0.08 - Do not change this value
$MA - Minimum Arc Segment
Don't change this unless you are seriously tweaking Controller Board for your application. It can cause many things to break. This value does not appear in system group listings ($sys)
$ma=0.10 - Do not change this value
$MS - Minimum Segment time in microseconds - Refers to S-curve interpolation segments
Don't change this unless you are seriously tweaking Controller Board for your application. It can cause many things to break. This value does not appear in system group listings ($sys)
$ms=5000 - Do not change this value












 default.zip





















 openmoco-0.91.tar.gz


